Create a free ticket and our support team will provide you necessary assistance.
Creating a Broadcasts - Storm Streaming Cloud
The purpose of this guide is to demonstrate and thoroughly discuss all aspects related to creating live broadcasts in the Storm Streaming Cloud service.
Preparations
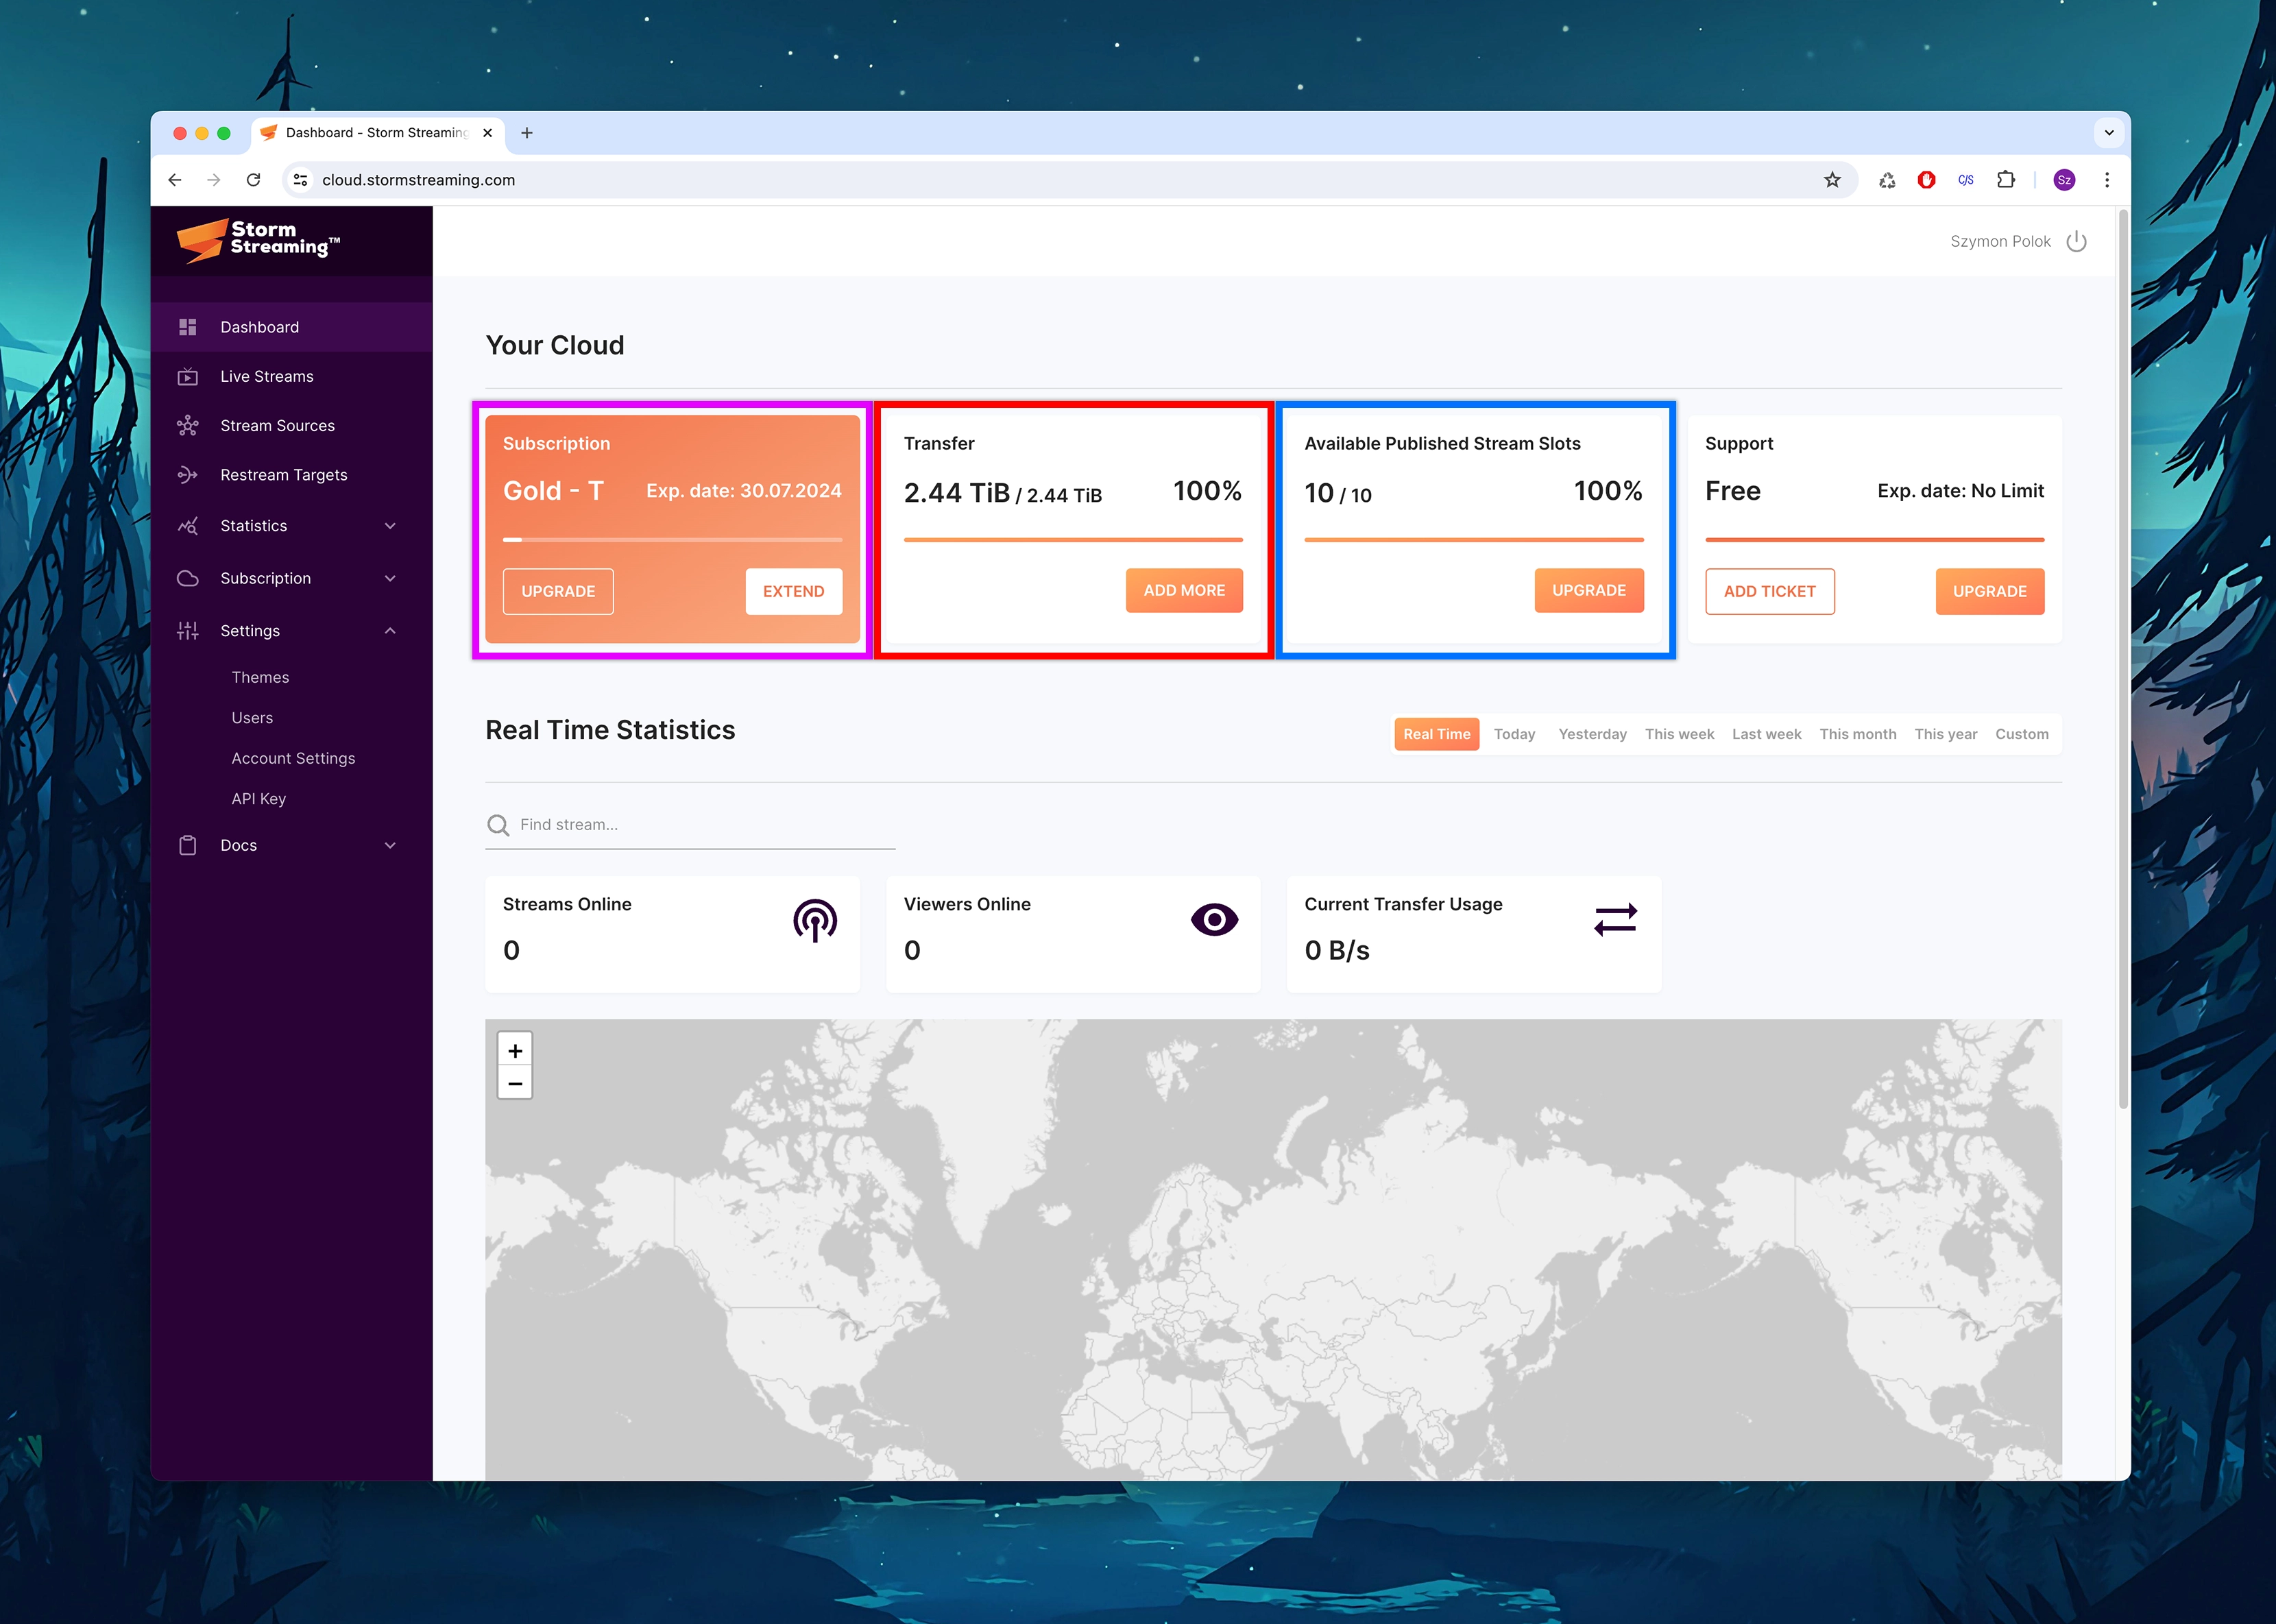
To set up a broadcast, we must first ensure that our account has an active subscription, an adequate number of available slots, and a sufficient GB allowance. For this purpose, we will use the Dashboard page, which can be selected from the sub-menu on the left side.
The first box displays the type of subscription and its status. It provides information on how many days are left until its expiration (or renewal, if such an option has been chosen). From here, we can also upgrade our subscription to a higher level.
The second box informs us about the remaining transfer quota that we can still use. Depending on the bitrate of our streams, this value will decrease faster or slower. Each subscription renews its pool of available gigabytes monthly, but there is also an option to "Add more" to top up the account. Below, we also provide a table showing how much resources a stream of a given resolution will consume per hour for a single viewer.
| Resolution | Frames per seconds (FPS) | Bitrate | Average GB/h |
|---|---|---|---|
| 1080p | 60 | 4500-6000 | 2.57 |
| 1080p | 30 | 3500-6000 | 1.93 |
| 720p | 60 | 2500-5000 | 1.93 |
| 720p | 30 | 1500-4000 | 1.29 |
Table 1. data transfer consumption per viewer-hour table
The last thing we need to consider is the number of available slots for broadcasting. Each active broadcast occupies one slot, and their maximum number is defined by the available subscription plan.
Creating a New Broadcast
We move to the "Live Streams" tab. Here, we can view all the streams we have created (both active and inactive). We select the "Create stream" option from the top-right corner. Once the pop-up appears, we enter the name of our stream, which will also serve as its title.

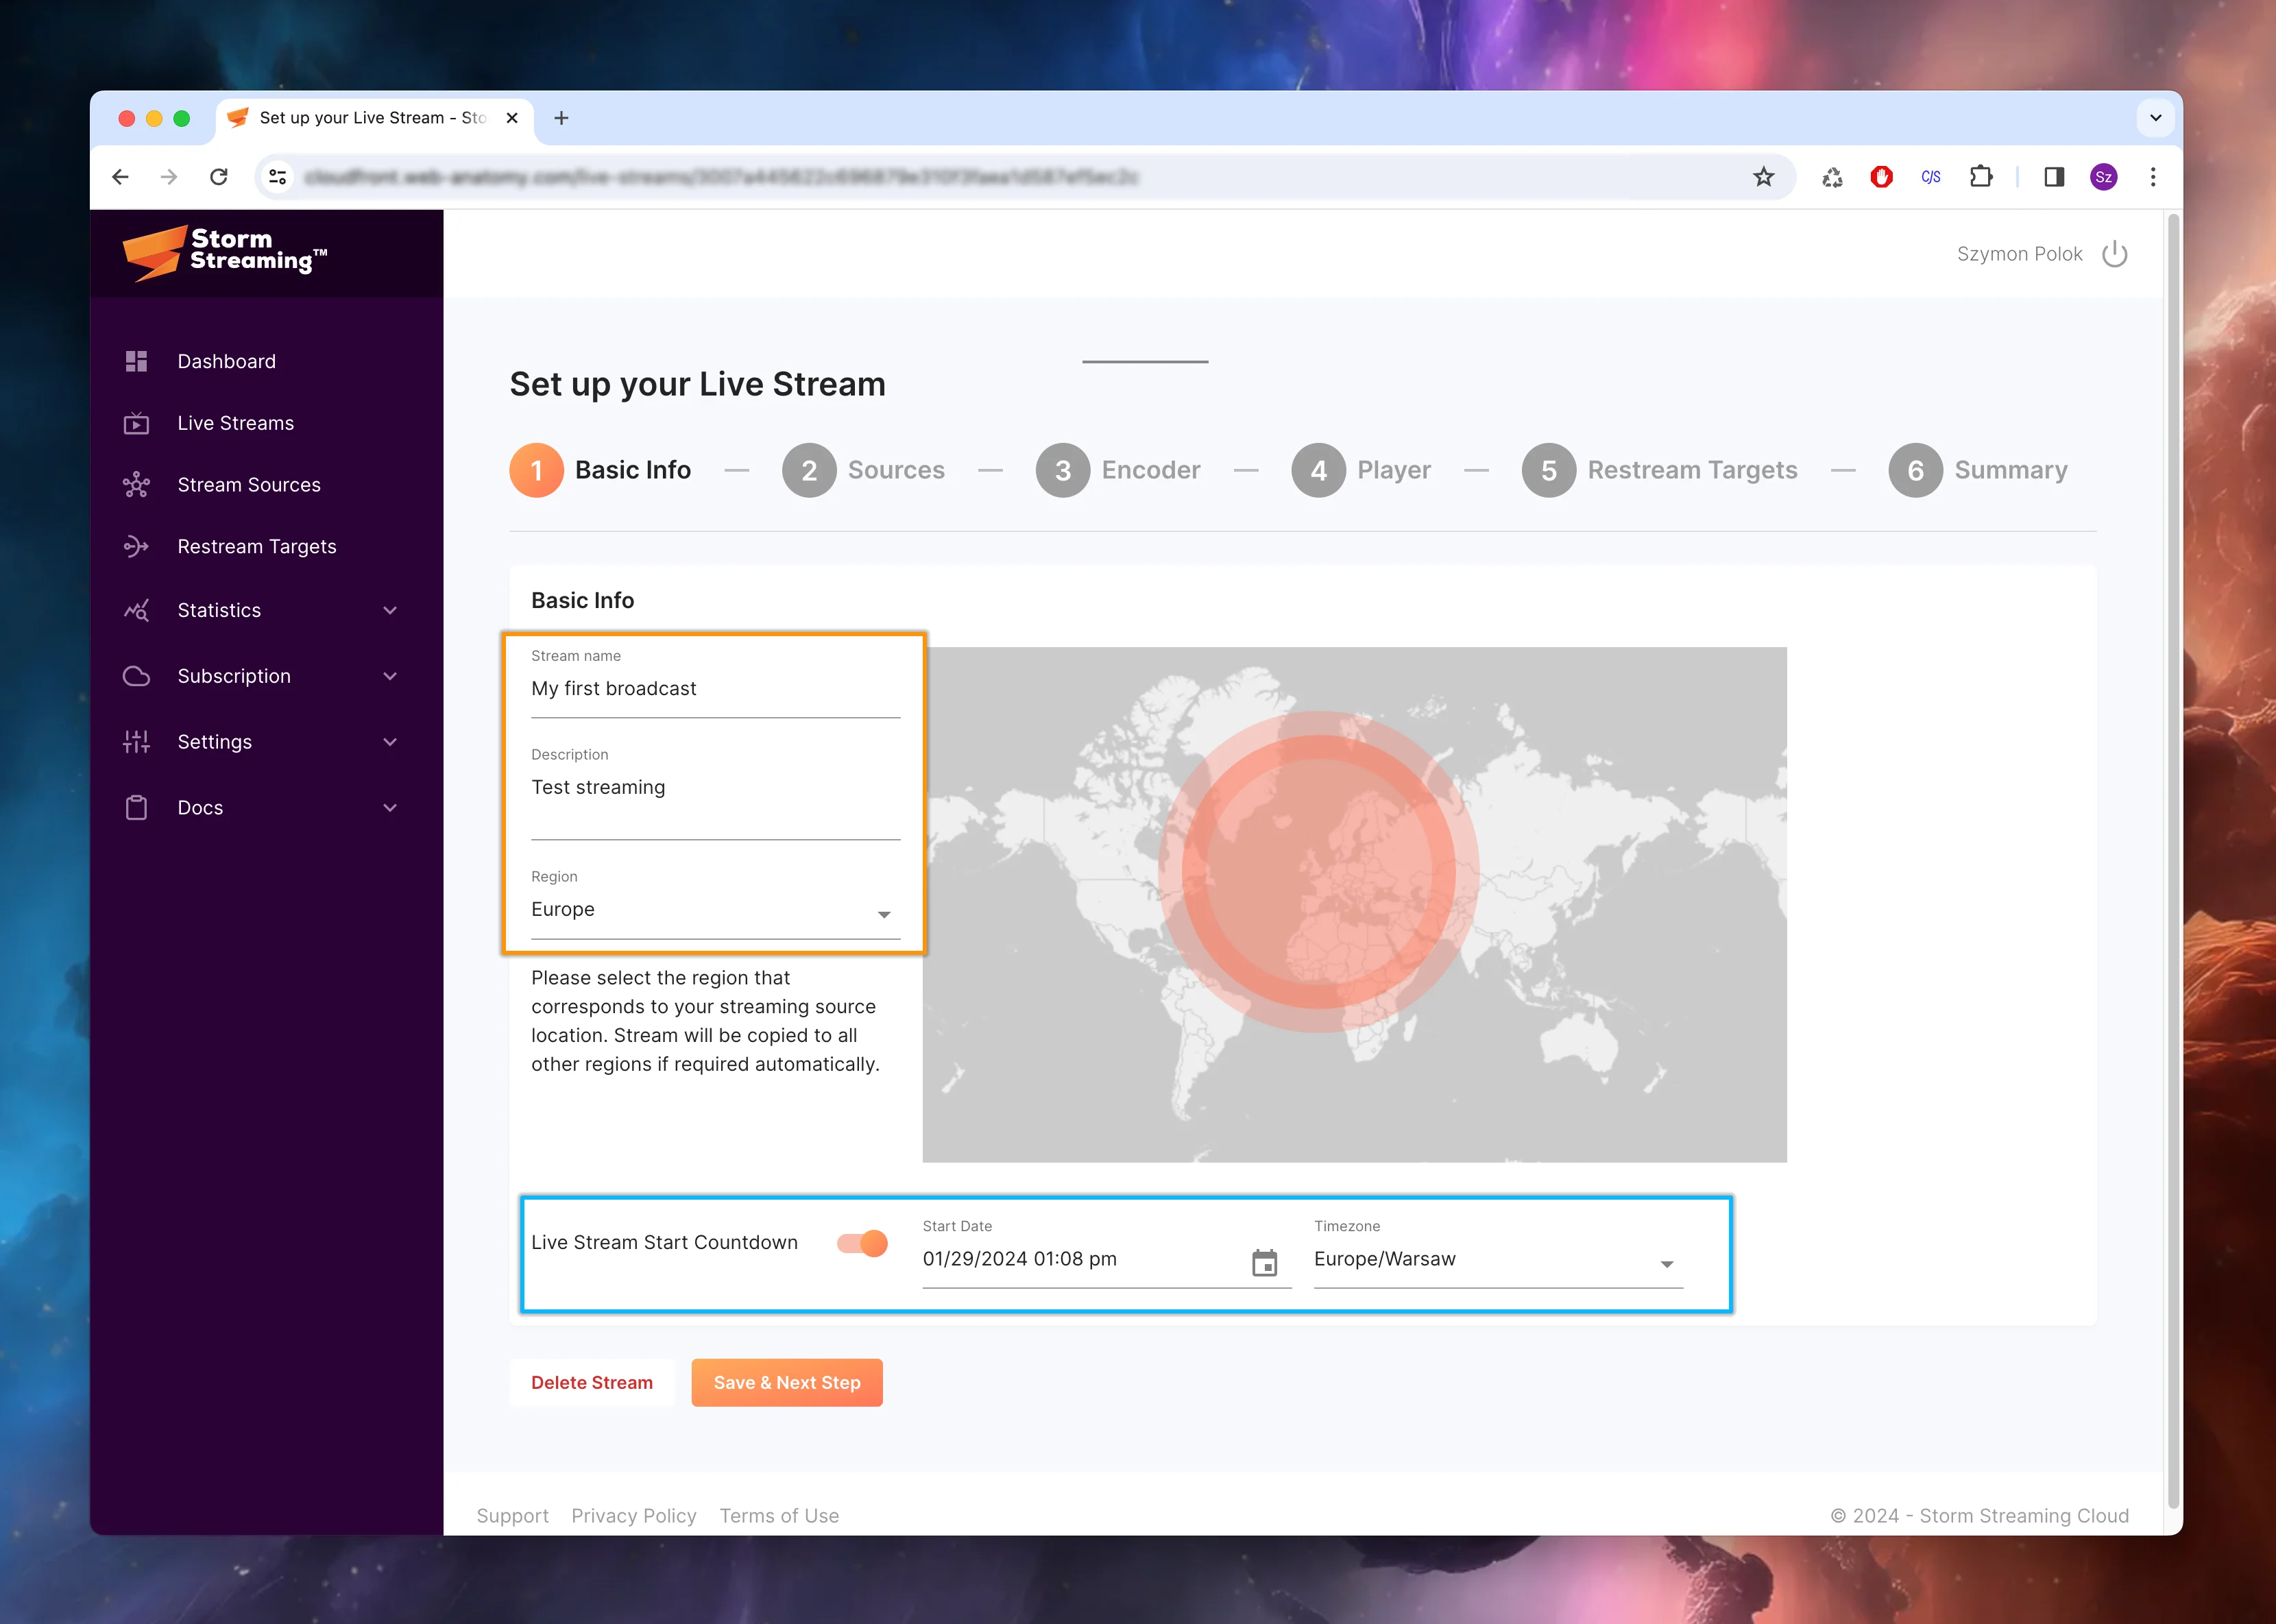
Step 1 - Basic Info
This is the first tab, which contains basic information about our stream. The name of the stream has already been filled in, but we can now correct it or even change it completely. Below, we can add a description of our broadcast (this will also be visible on the video player). The third option is to choose the region from which we are streaming. This involves selecting servers that receive the stream and are located nearest to your location. The location of your viewers does not matter here.
If our event is to take place in the future, we can enable a countdown (aka Waiting-Room) for it. In the case of embedding a Web Video Player, it will show how much time is left until the premiere (implicitly the start) of the stream. This is a great option if we want to advertise our broadcast. To activate this option, we must also enter the start date and the time zone according to which we will begin broadcasting. Viewers will see the start time recalculated for their base time zone.
The Live Countdown is displayed in the form of circles, which represent numerically and as a pie
chart the time remaining until the start: days, hours, minutes, and seconds.
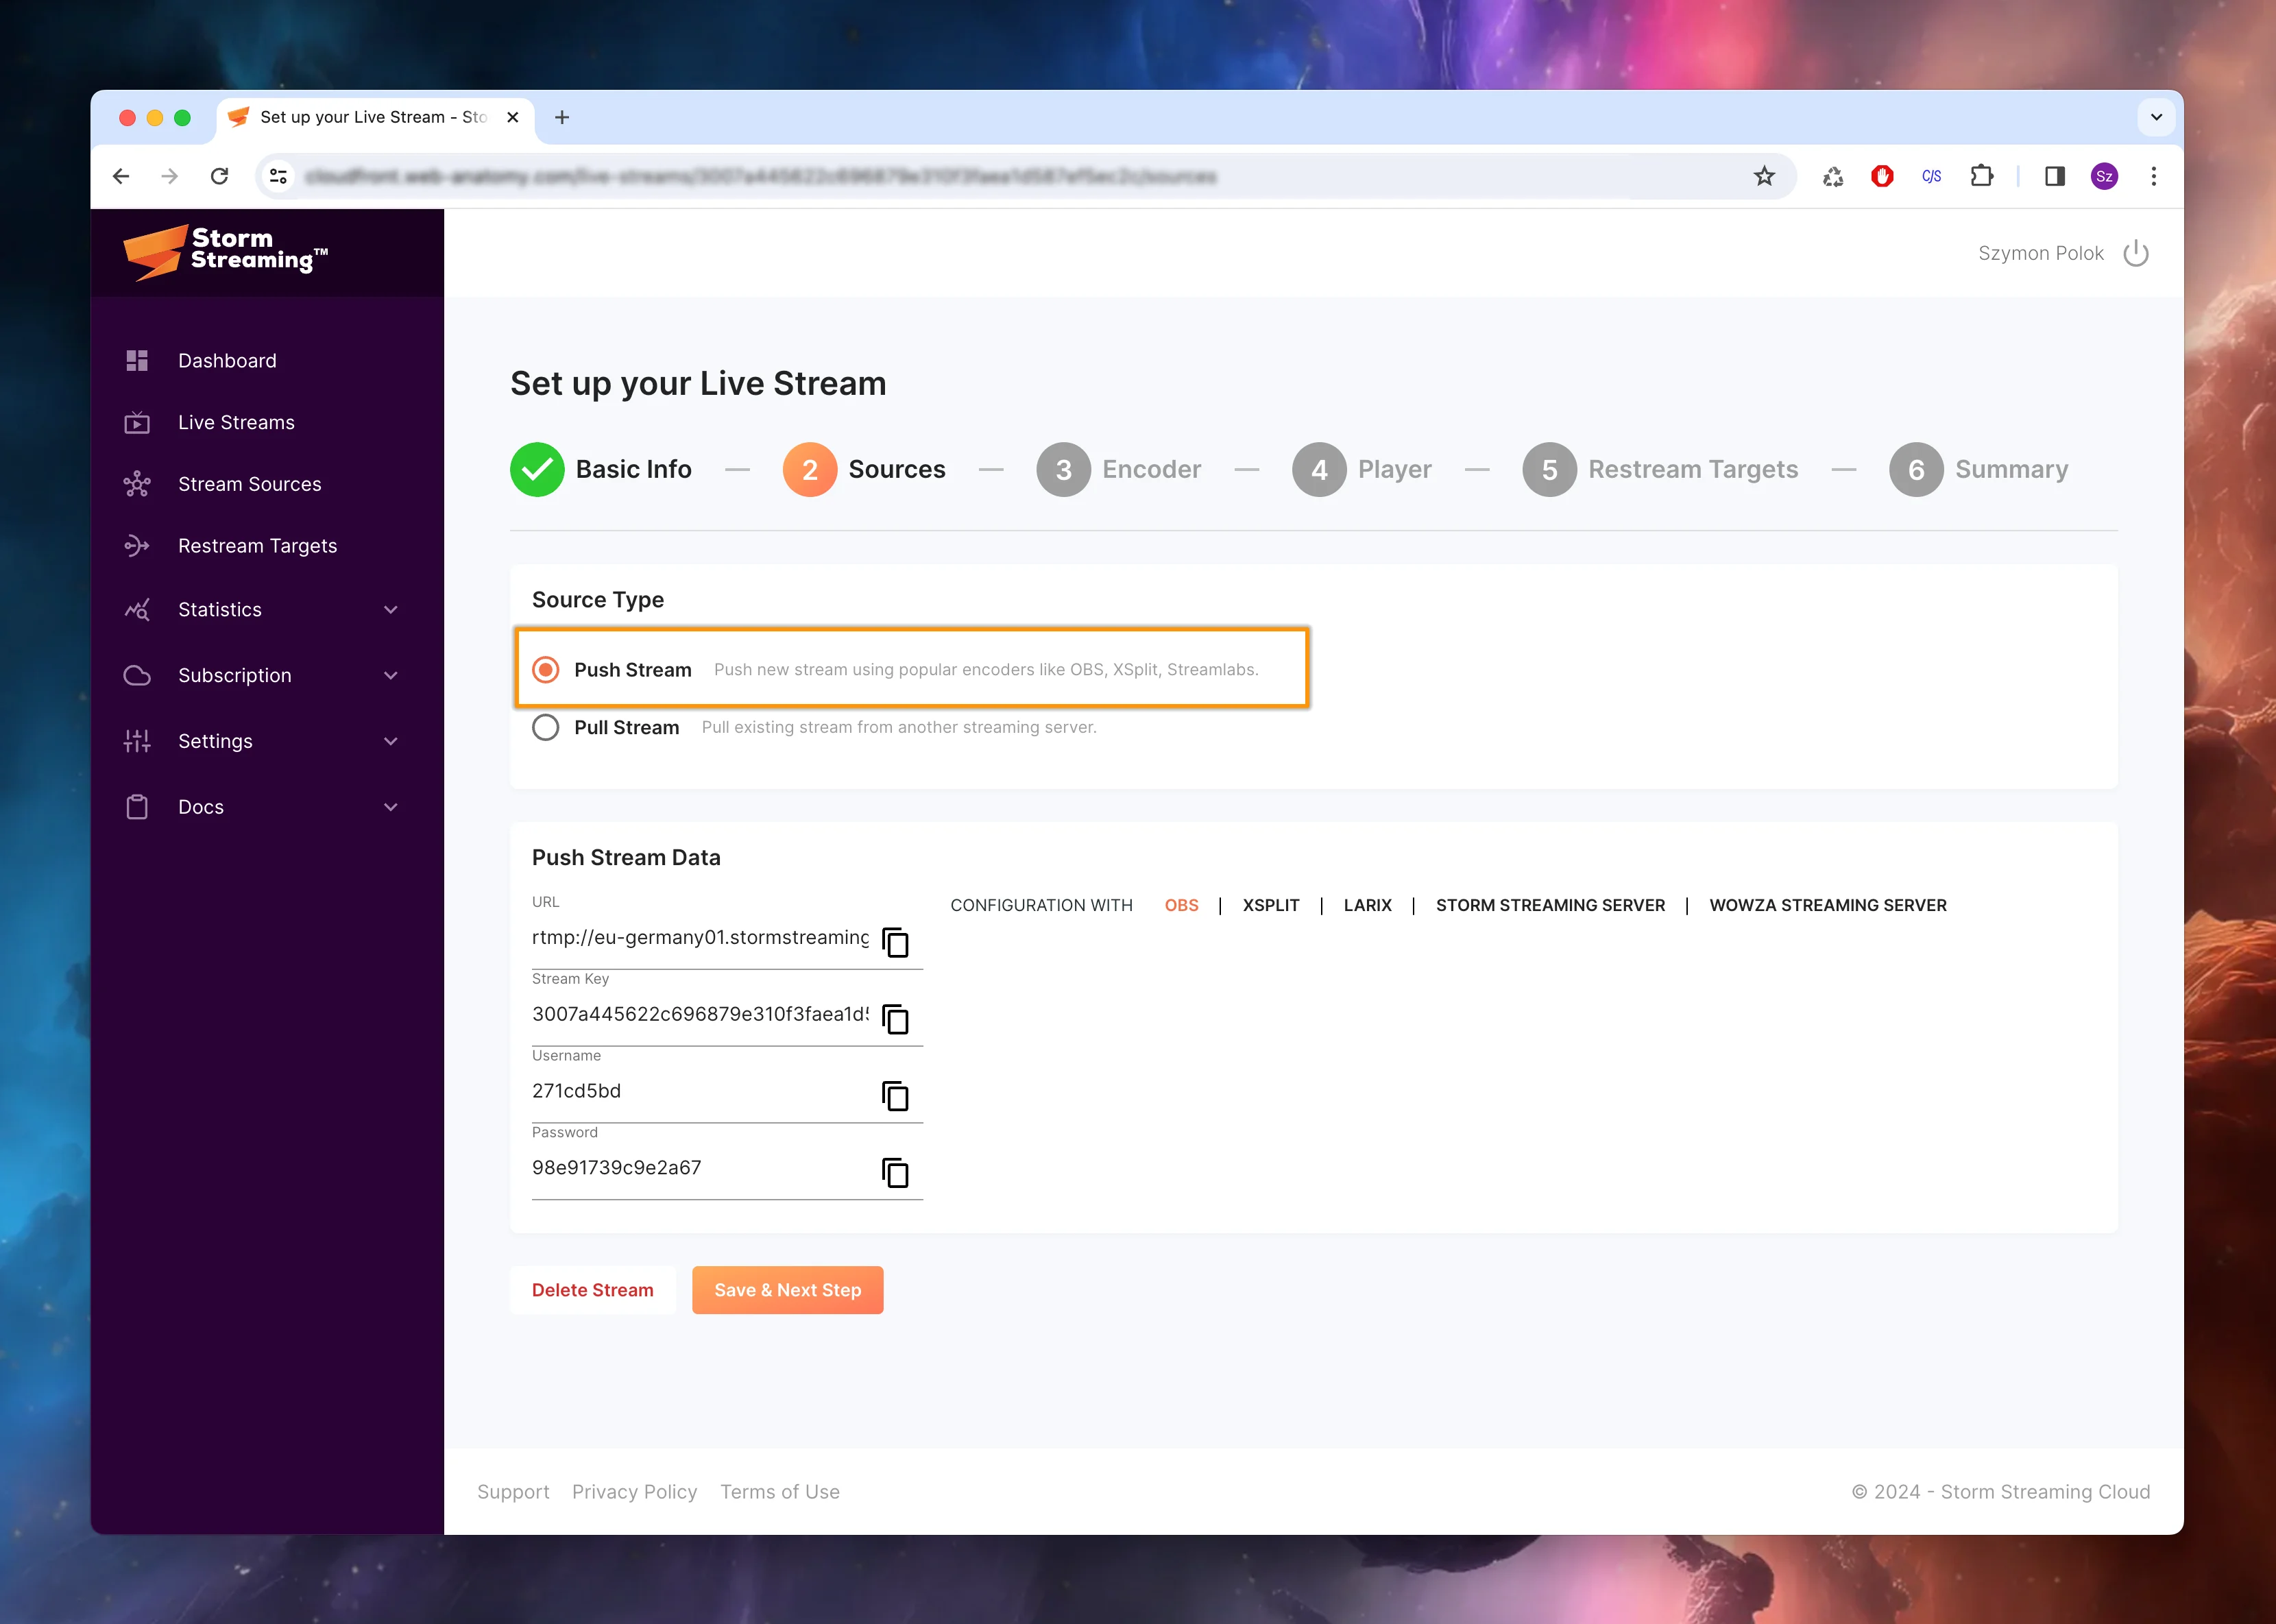
Step 2 - Sources
At this stage, we need to decide how we want to deliver the stream to the Storm Streaming Server service. We have two options here:
Push Stream – this method involves using dedicated software such as OpenBroadcaster, XSplit, FFMPEG to broadcast the stream via the RTMP protocol to the origin server specified on this subpage. All we need to do is enter these data in our streaming application.
If you're wondering how to configure such an encoder to work, we invite you to check out our tutorials dedicated to Stream Ingest Guides:
- Ingest to Storm Streaming Cloud with OpenBroadcaster (OBS)
- Ingest to Storm Streaming Cloud with Xsplit Broadcaster
- Ingest to Storm Streaming Cloud with Larix Broadcaster (iOS & Android)
- Ingest to Storm Streaming Cloud with FFMPEG
Pull Stream - this is a more complicated method, intended for individuals who have their own RTMP server. Here, the Storm Streaming Cloud will copy the stream to itself from the specified location. There is also the possibility of predefining streams through Stream Sources – this will be particularly useful if we often use the same sources.
Step 3 - Encoder
On the third subpage of the broadcast creation wizard, we can choose one of two Encoder modes in Storm Streaming Cloud. The first, called "Adaptive Bitrate," allows us to automatically prepare sub-versions of our broadcast in lower resolutions and bitrates. This is a good choice if we aim to reach the widest possible audience, including those with slower internet connections. The quality selection at the viewer's end occurs automatically unless the viewer chooses a specific quality from the available list. The downside of this solution is a slightly longer delay (an additional 1-2 seconds) compared to the base stream.
If you choose a subscription without the transcoding option (Passthrough), the Adaptive Bitrate
option will not be available.
The passthrough method allows for the distribution of the stream without any modification. This option does not provide access to multiple quality choices, but it keeps the delay in transmission at the lowest possible level.

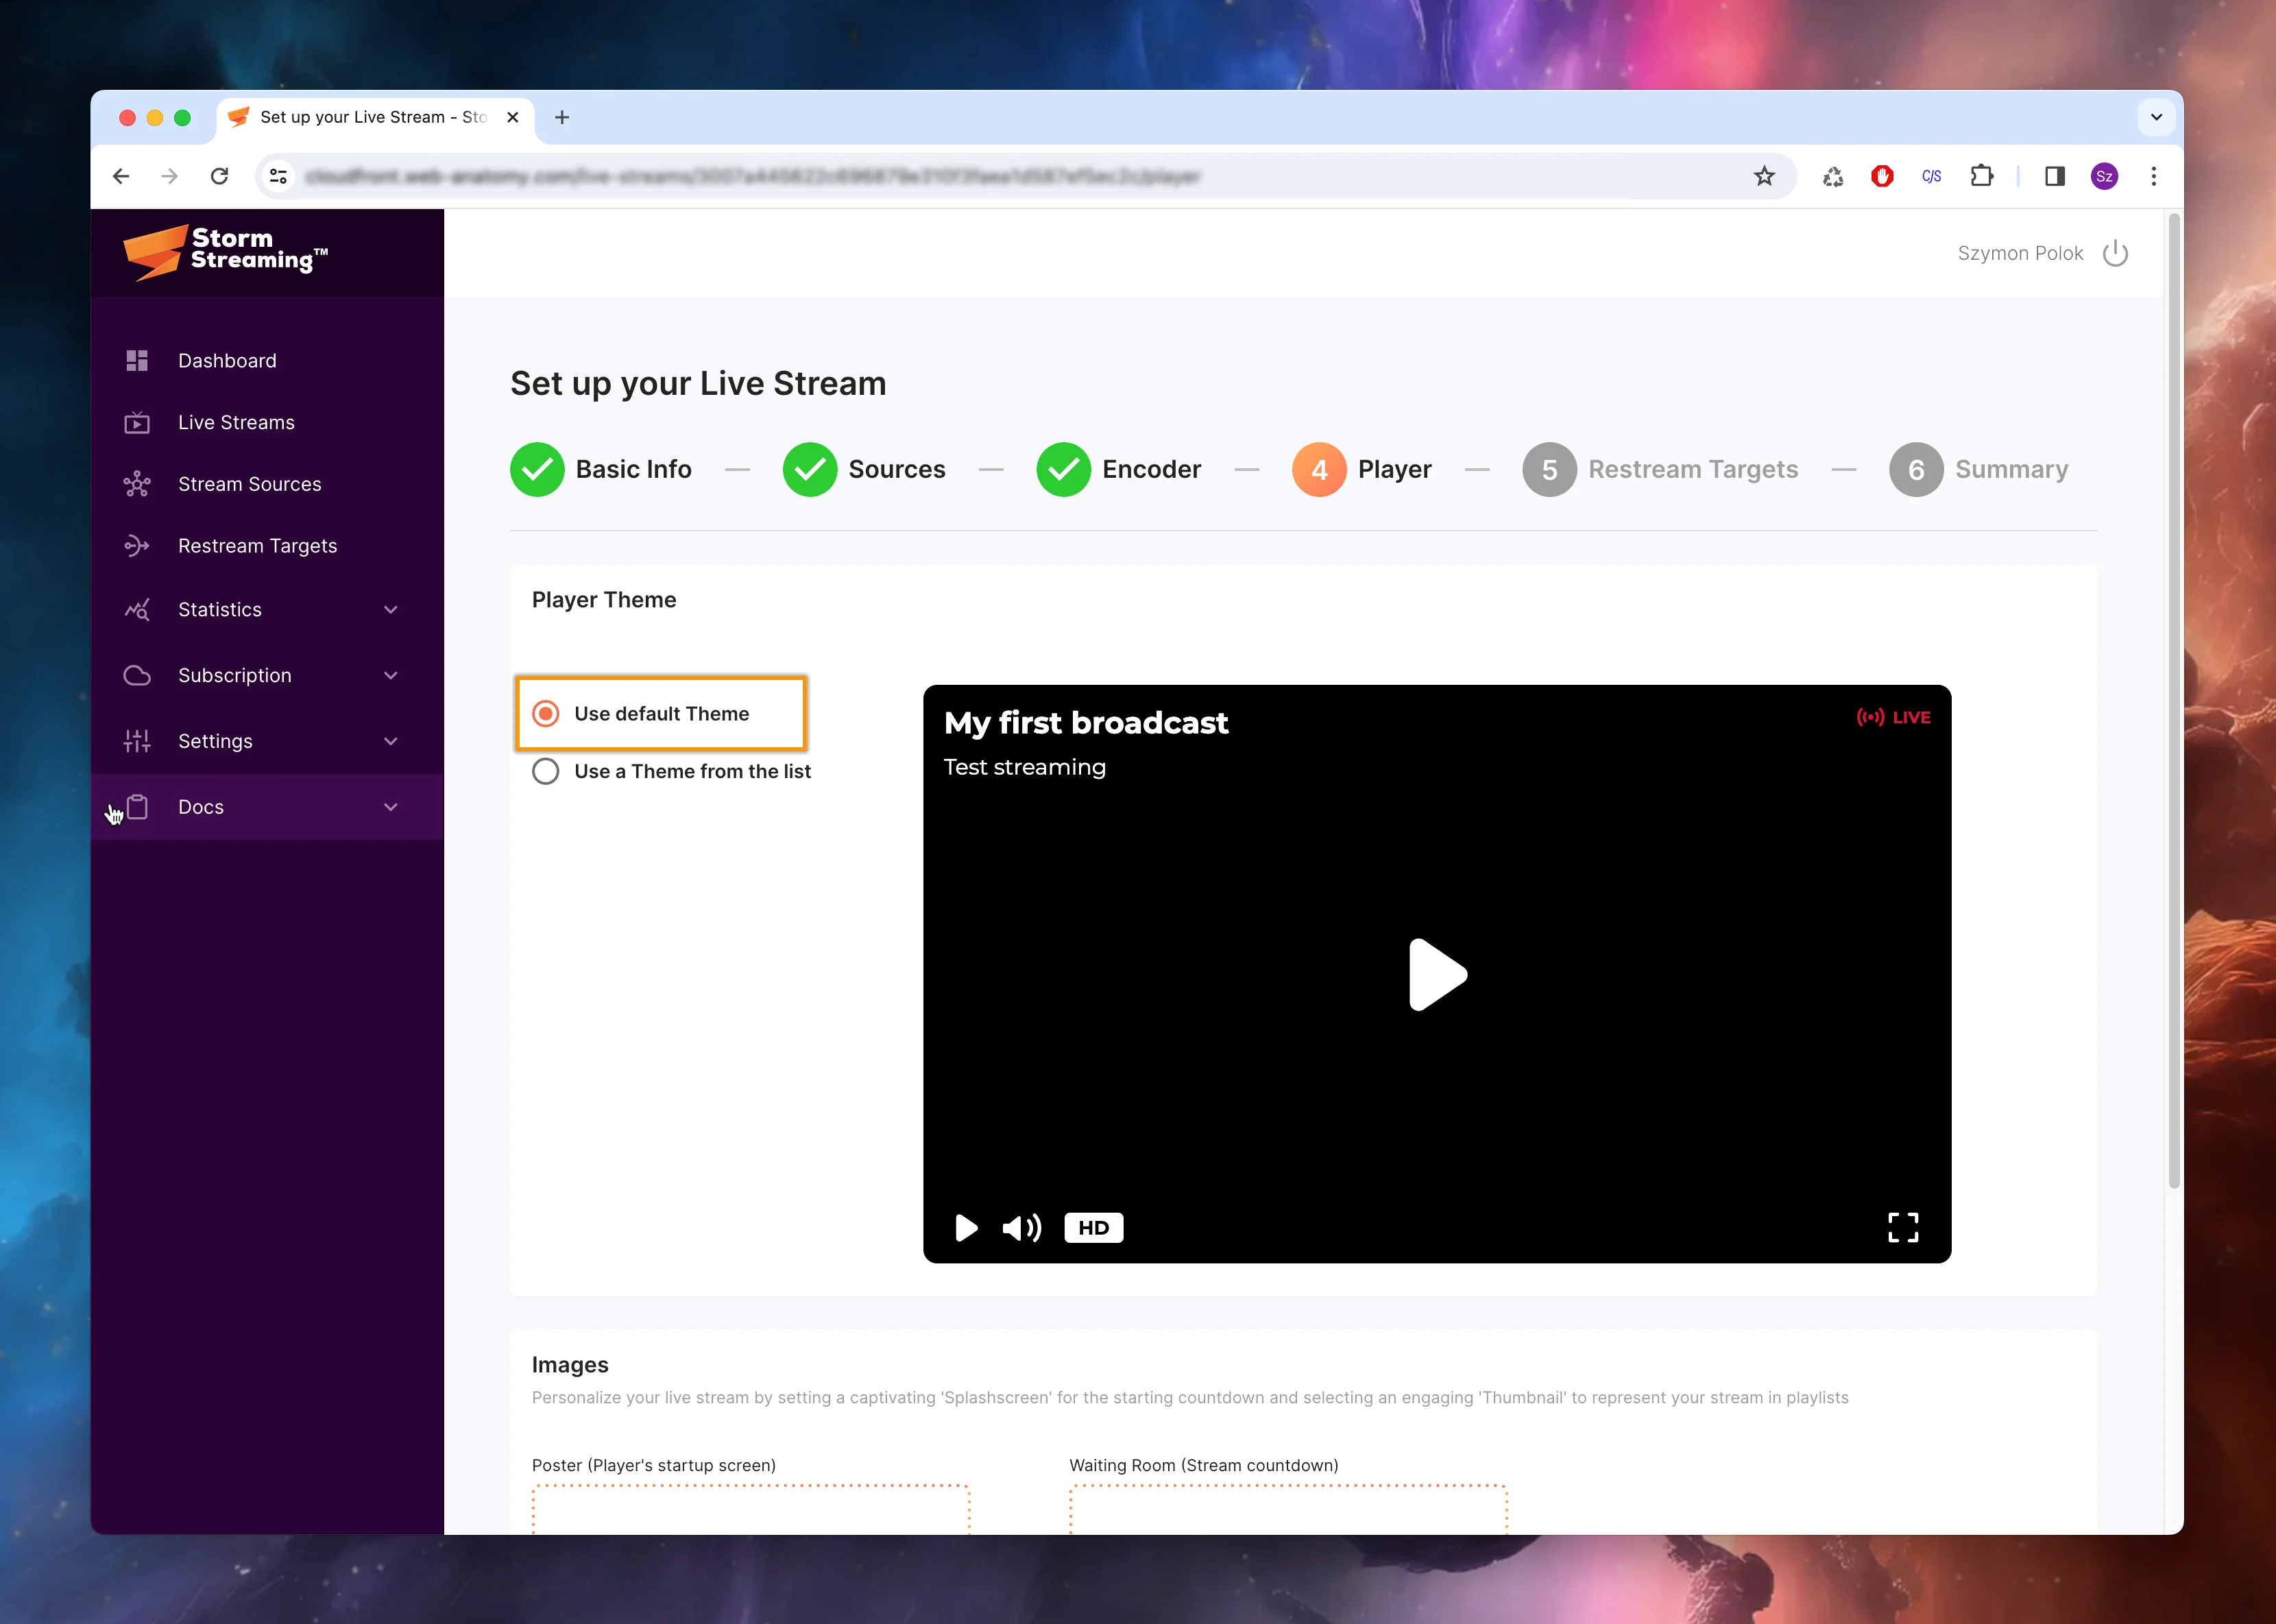
Step 4 – Player
In this step, we can select the style (i.e., a set of colors and options) for our Web Video Player. Storm Streaming Cloud allows the creation of multiple themes, which differ in elements such as font colors, button colors, backgrounds, and also behaviors such as autostart, or the user interface hiding after a few seconds of no interaction. You can also add your own watermark, which will be visible in the corner of the player. Themes also store all the messages that may be displayed during the broadcast, so they can be used to translate the player into another language.
A more detailed description, along with a list of available options, is available in the
Themes
& Customization
guide.
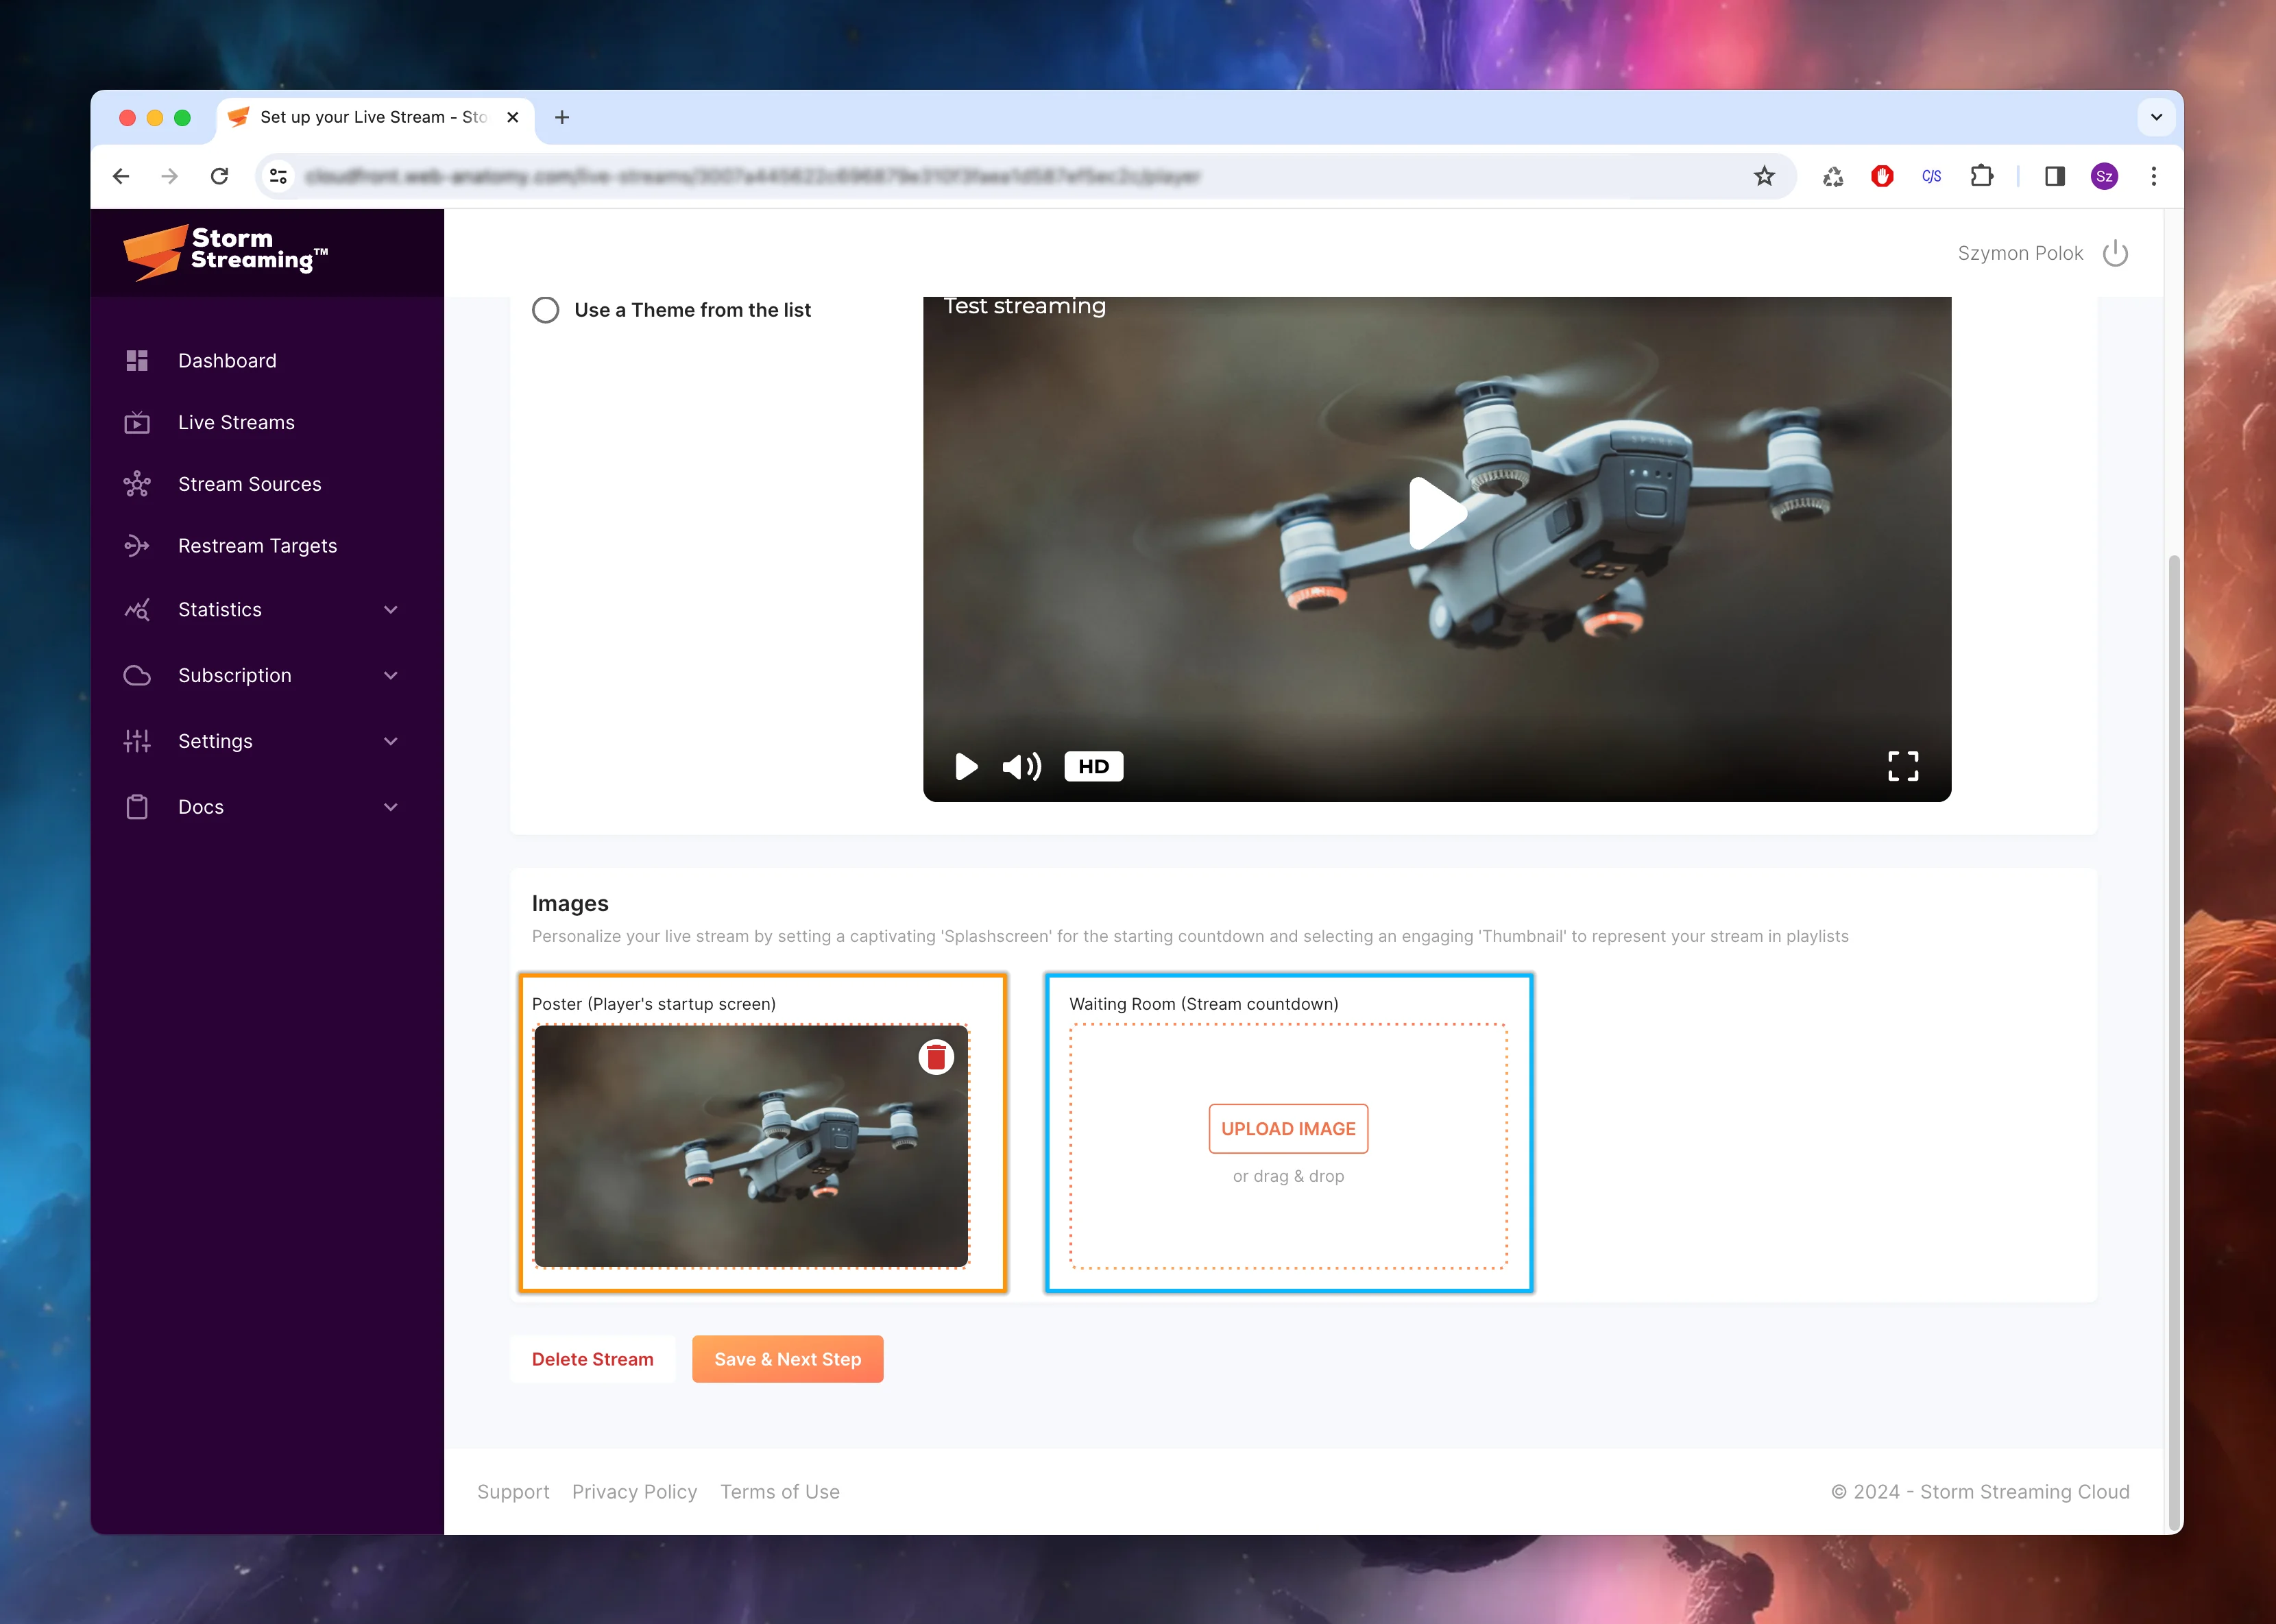
Right below the Player Theme block, we also have the option to introduce a Poster, which is an image displayed before the video starts (if the player is not in autostart mode), as well as a dedicated image for the Waiting Room, if it was configured in step no. 1. Images can be uploaded either by clicking on the corresponding blocks or by dragging files from your computer onto them.
We recommend that images be in a relatively high resolution (e.g., 1920x1080) and reflect the aspect ratio intended for the player and the video material (preferably 16:9).
Step 5 – Restream Targets
One of the key features of Storm Streaming Cloud is the ability to simultaneously re-stream broadcasts to multiple other video platforms and social networks such as Facebook, YouTube, and Twitter (though Twitter support may vary).
The re-stream begins when you start broadcasting your stream and ends precisely when you disconnect from your base Origin server. Re-streaming is possible through the correct RTMP address.
To activate the Restream Target option, individual entries must first be prepared. This can be done before creating the transmission via the Restream Targets menu on the left side of the screen, or during transmission creation by selecting the “Create Target” option.
Finally, simply select which entries from our list we want to activate, and we can move to the last step, which is the summary.

Step 6 – Summary
At this stage, all the data for our stream has been entered and configured. Our broadcast now exists, but it is not active yet. Of course, we can change the previously entered settings at any stage. This can be done using the tabs located at the top of the subpage, or the Edit button next to each block of this broadcast.
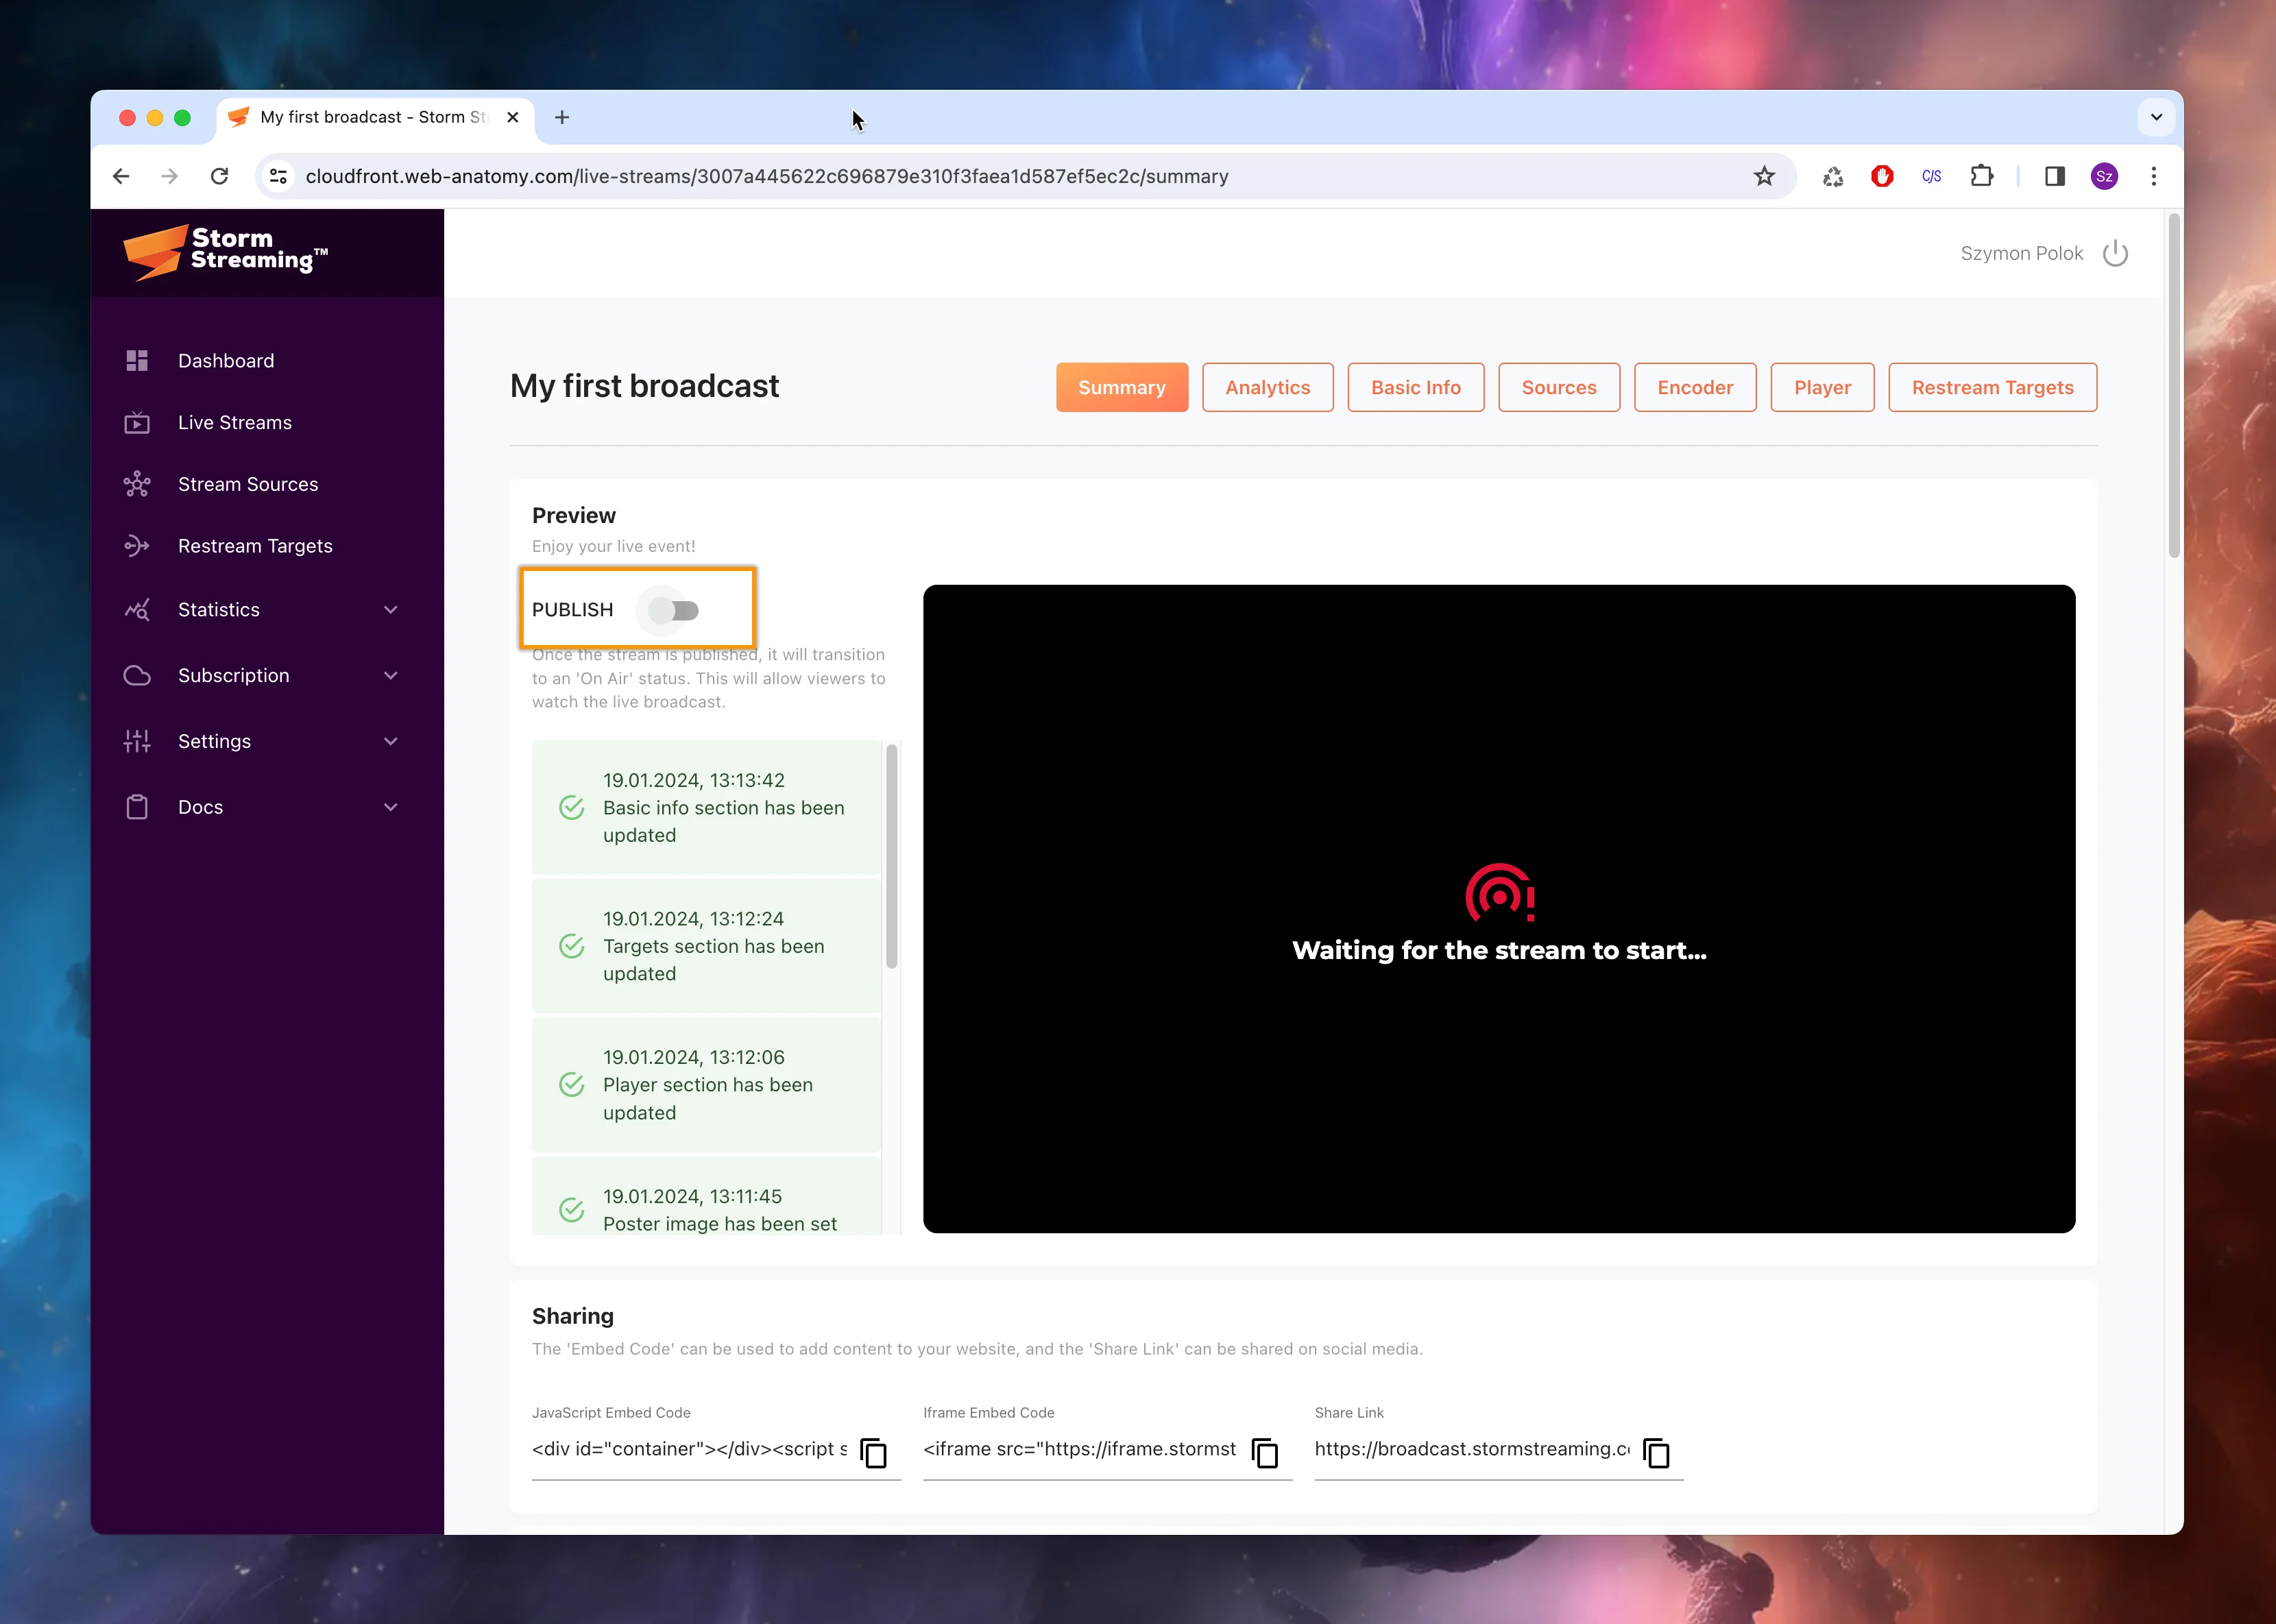
Now, let's focus on the summary subpage itself. Here, we'll notice three important components:
Switch Publish – This determines whether the broadcast is considered published or not. At any time, we can deactivate an active broadcast and then restore it to published status. When you are ready to start your broadcast, it is recommended to first connect through the encoder to our server and then use this switch (otherwise, the Player will display a message to viewers that it is waiting for the stream).
Event Log – This is a real-time refreshed list that informs us about what is happening inside our stream (for example, if a password is entered incorrectly into our encoder, an error message about authentication failure will appear here). It also tells us exactly when the stream was published or when we connected an external encoder to the Storm Streaming Cloud origin server.
Preview Player – This is our Web Video Player, which shows the transmission exactly as our viewers see it. This ensures that the stream is functioning properly and everything is proceeding as it should.
Conclusion
That's everything you should know about creating broadcasts in Storm Streaming Cloud. Before you start your actual live broadcast, we encourage you to test and try all the options available so that you feel confident and comfortable when the time comes. If you have any questions or concerns, we encourage you to contact our Support department.
Support Needed?