


We encourage you to explore our Storm Streaming Server documentation. It covers
individual server configuration elements and provides information about popular
protocols such as RTMP, HLS, and more. The samples
directory also contains several example video players preconfigured to work with
your Storm Streaming Server instance.
For the next step we advise our Quick Start Guide
Windows Installation - Storm Streaming Server
Installing Storm Streaming Server on computers running Windows OS is very simple thanks to the
dedicated installer. This guide will walk you through all the necessary steps of the process and
show you the basic server configuration.
If you don't have the installer yet, please visit our Download page.
Running the Installer
Once the installer file has been downloaded, double-click it and wait for it to launch.
Installer Steps
The installer will now guide you through the following steps:
-
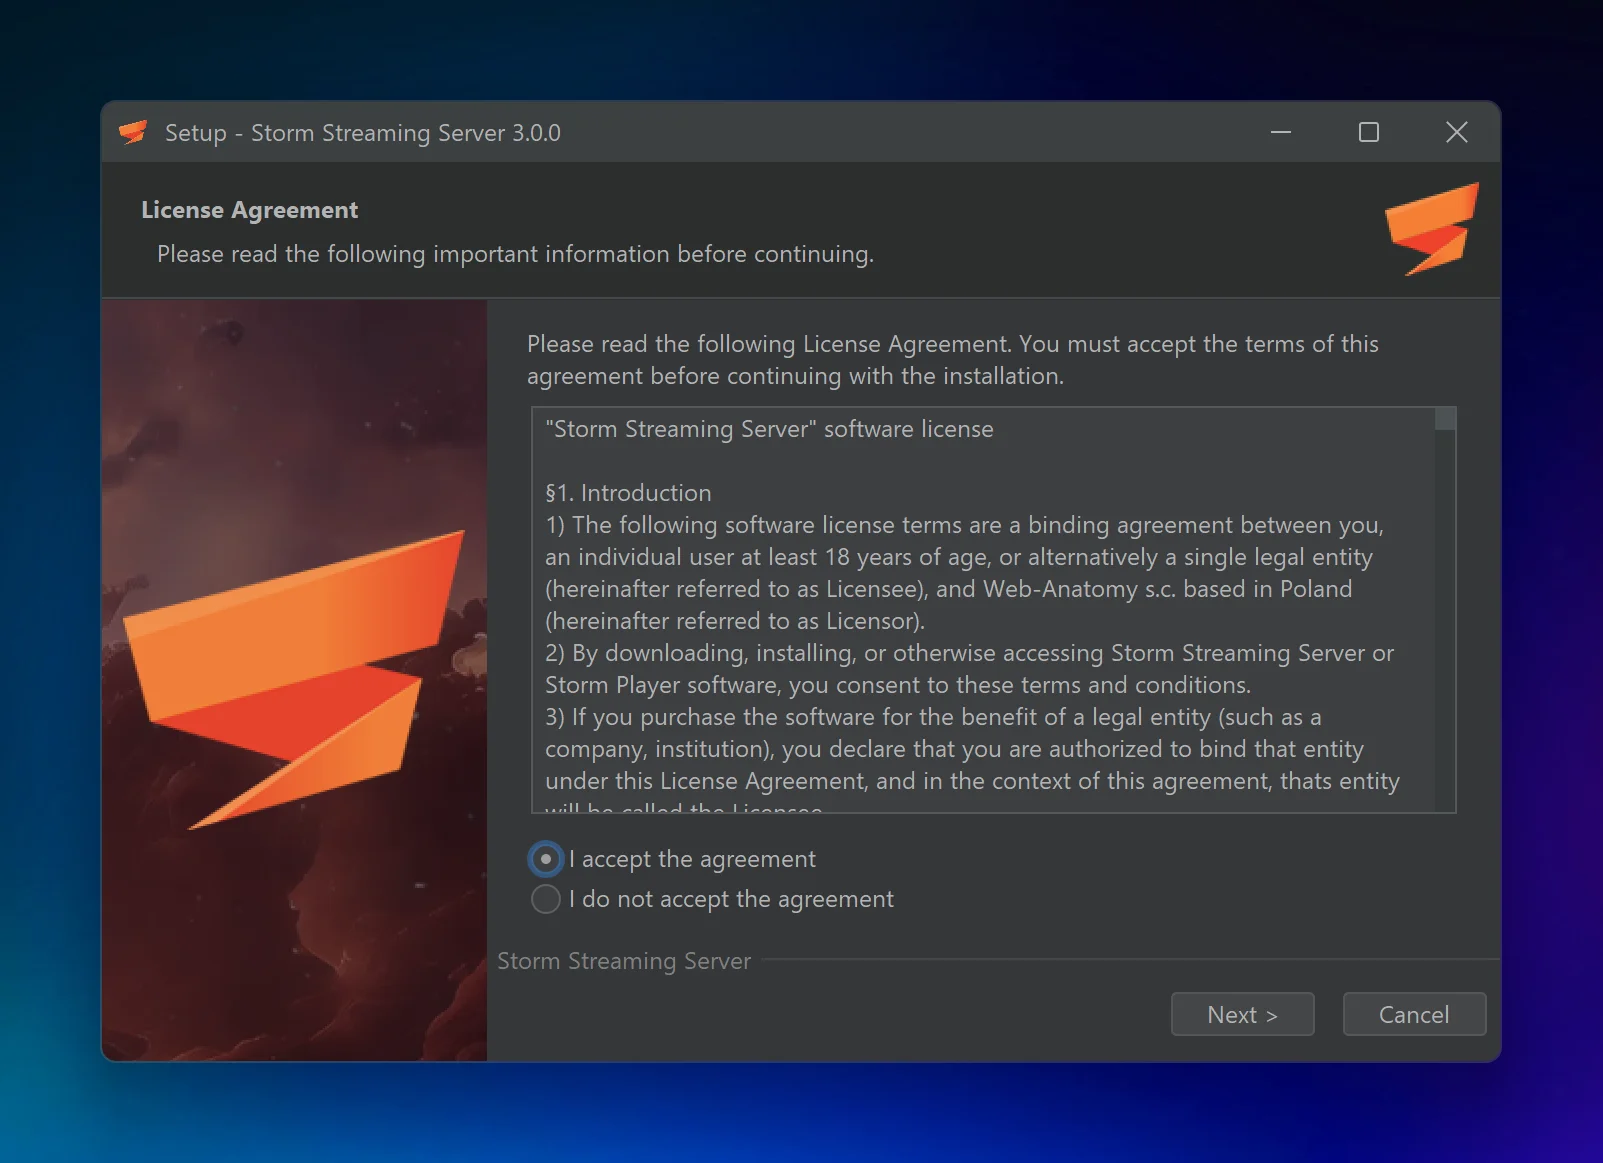
Accept the Software License
In the first step, you must accept the software license agreement.

-
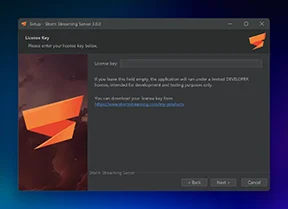
Enter the License Key
In the second step, you will be asked to enter the program license key. If you don’t have a license, you can leave this field blank. A developer license will be assigned instead, which allows up to 5 concurrent streams and a total of 10 viewers.
If you have a commercial or non-commercial license for Storm Streaming Server, you can view it on this page: https://www.stormstreaming.com/my-products
-
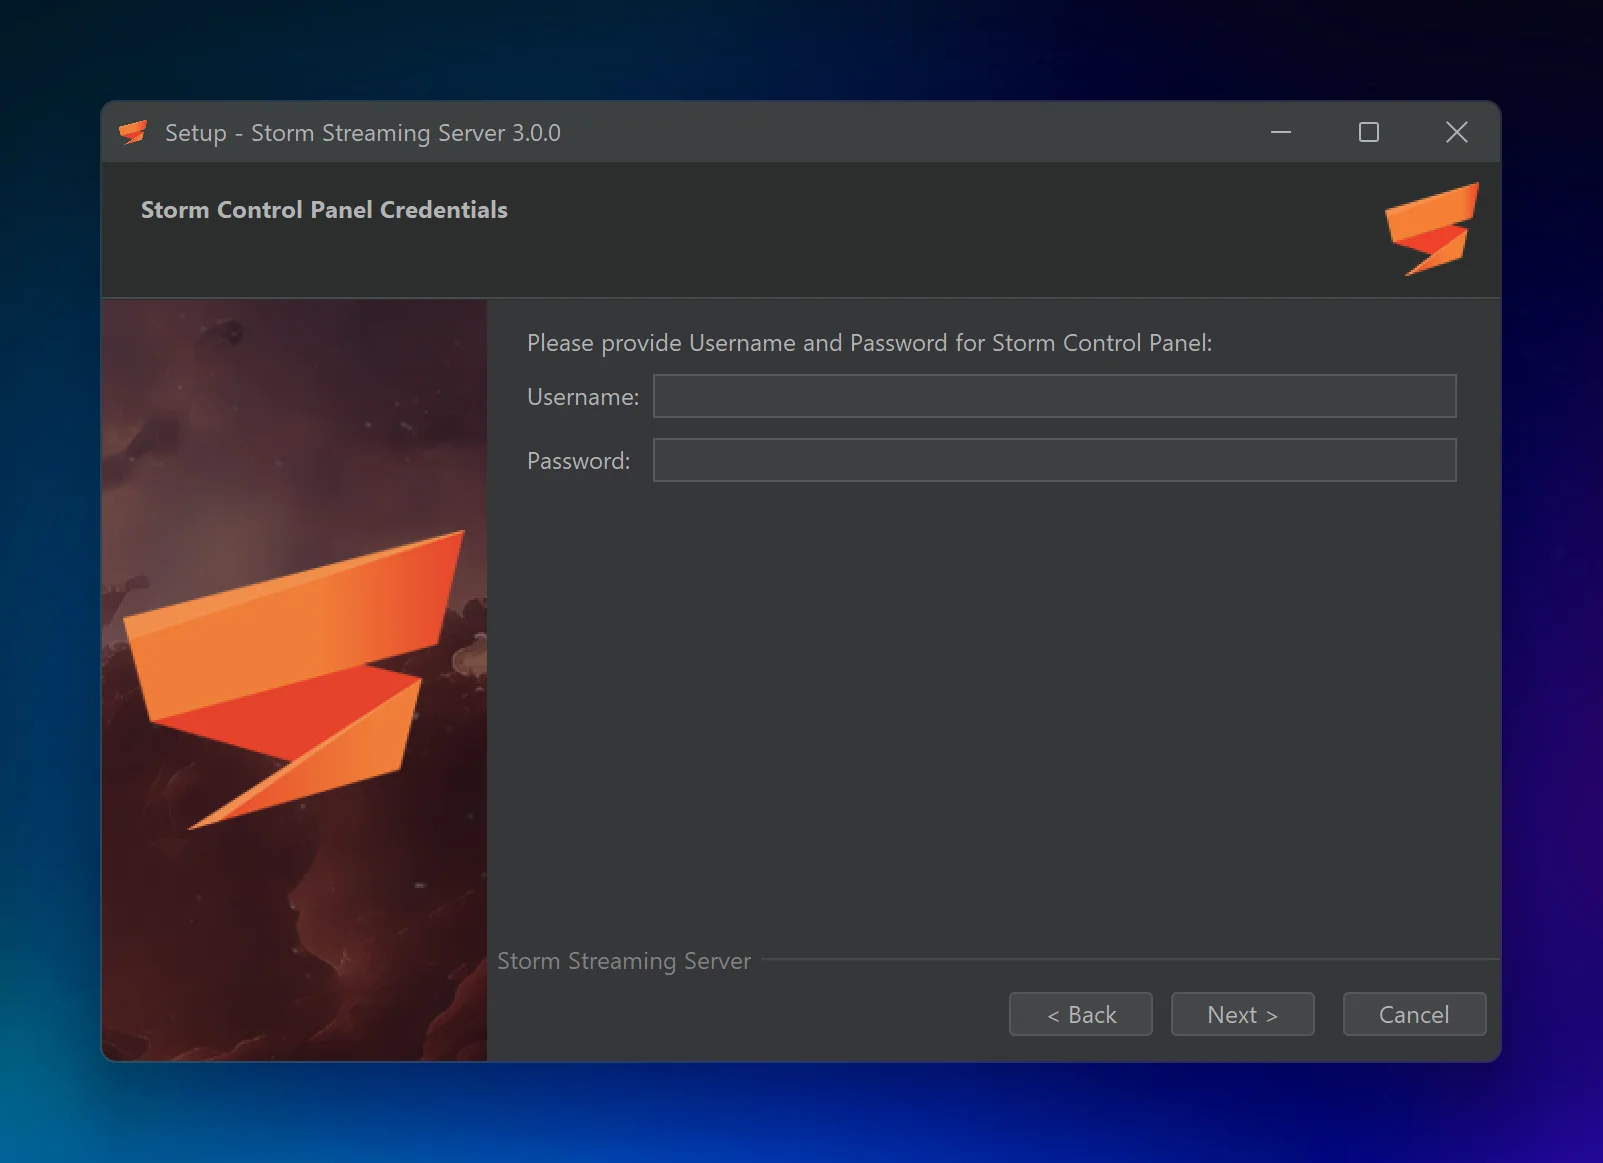
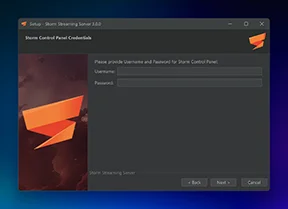
Provide Username and Password for Storm Control Panel In this
step, you need to provide the admin username and password for Storm’s web-based Control
Panel.
-
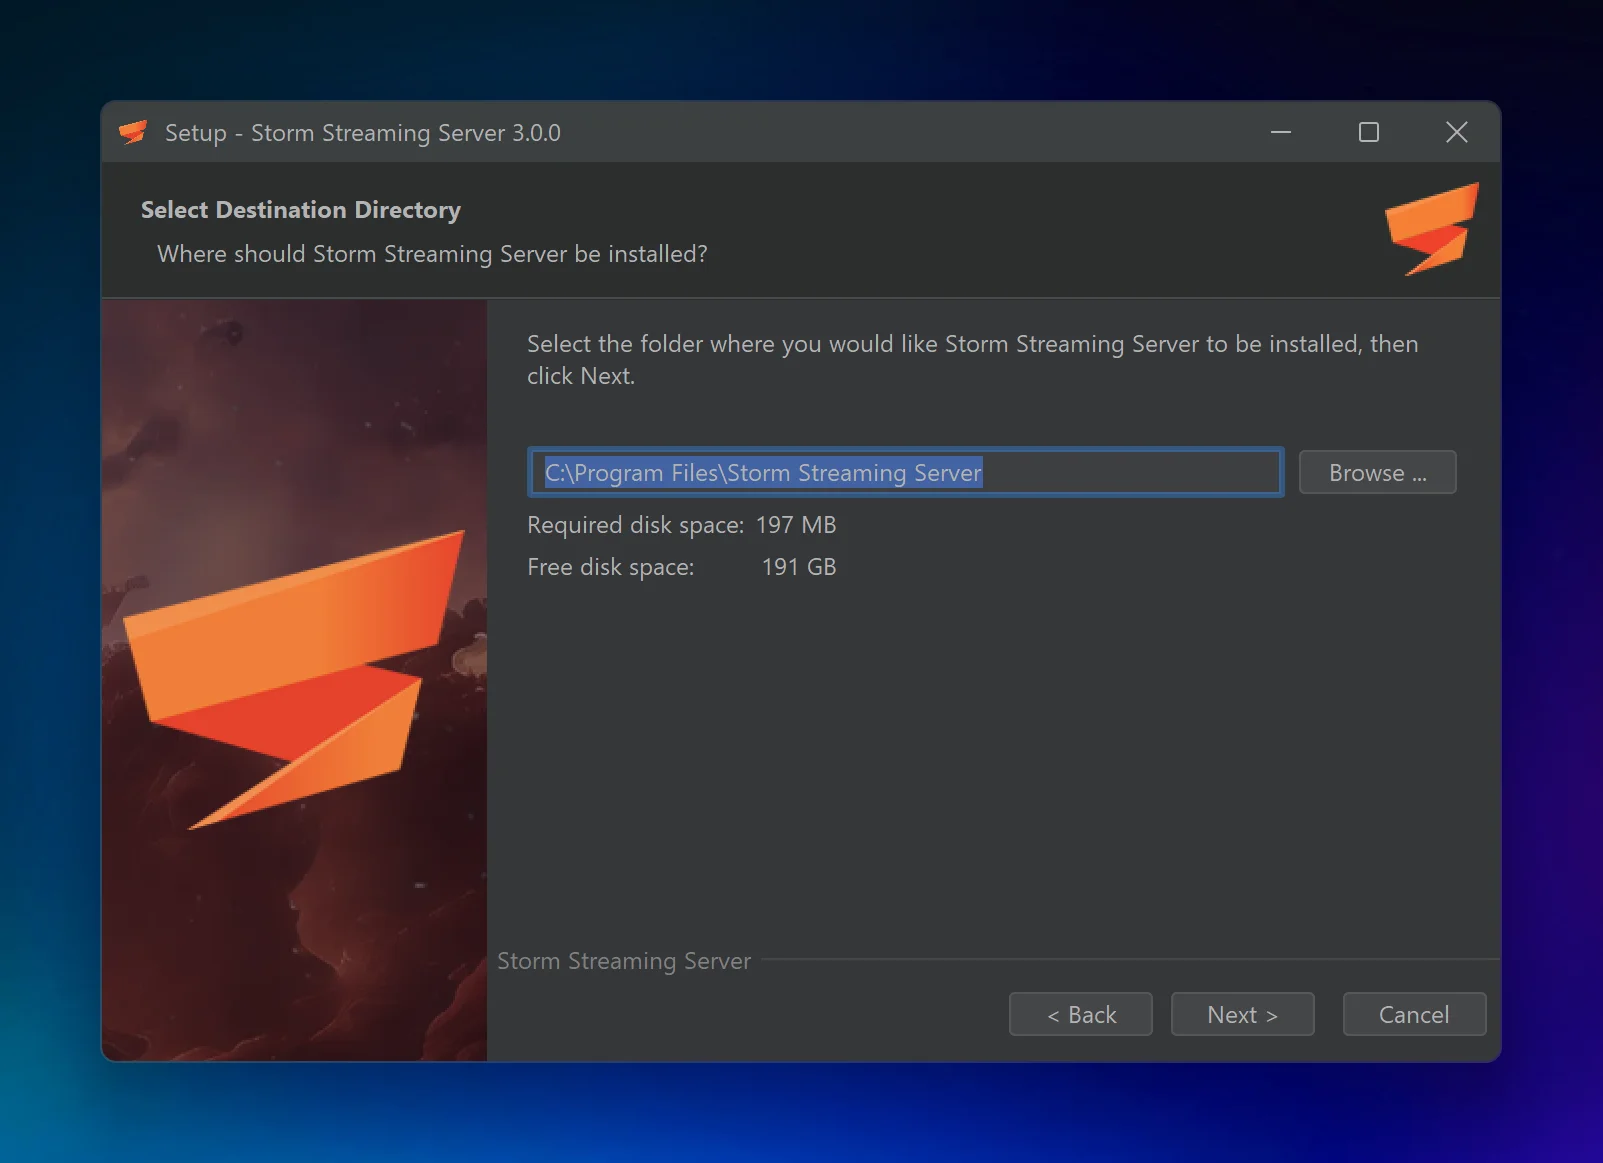
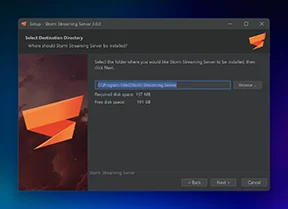
Choose Installation Location
In the fourth step, select the directory where the application will be installed.
-
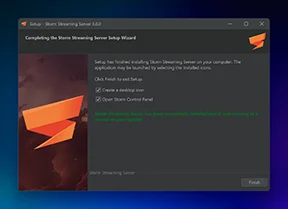
Optional Settings
In the final step, you can select a few additional options:- Create a desktop shortcut
- Open Storm Control Panel
Basic Configuration
Now that the Storm Streaming Server application is installed, go to the installation folder you specified in step 3. There are a few things to configure here:
-
JVM Configuration
In the file Storm Storm Streaming Server.vmoptions, you'll find JVM options that define, among other things, how much RAM should be allocated to the application. The default file content is:
-server
-Xmx16g
-Xms4g
-XX:+UseG1GC
-XX:MaxGCPauseMillis=100
The -Xms and -Xmx parameters define the minimum and maximum amount of RAM available to the application. You should adjust these values to match your hardware resources. For example, to allocate a maximum of 128 GB and a minimum of 32 GB, change the values to:
-Xmx128g -Xms32g -
VHost Configuration
The socket configuration for Storm Streaming Server is located in the file config/preferences.xml. By default, it includes the following block:
<VHosts>
	<VHost host="127.0.0.1" isSSL="false" port="1935">
		<Protocols>RTMP</Protocols>
	</VHost>
	<VHost host="127.0.0.1" isSSL="false" port="8080">
		<Protocols>HTTP, WEBSOCKETS</Protocols>
	</VHost>
</VHosts>
This defines two sockets listening on 127.0.0.1 (localhost). Port 8080 handles HTTP and WebSocksts connections, and port 1935 handles RTMP. For more information about VHost configuration, including how to enable SSL support, please refer to our VHosts guide.
In order to apply these changes, please restart the server. The following section explains how to stop and start the Storm Streaming Server service.
Managing the Service
You can access the web-based control panel of the application using the 'Strom Control Panel' shortcut. Alternatively, you can open it directly in any web browser at: http://127.0.0.1/cpanel (the IP address and port may vary depending on your VHosts configuration).
Since the application operated as a service, it'll be started automatically with the system. Below you'll find basic commands:
You can run the commands using Command Prompt. Type 'Command Prompt' in the Start menu, then
run it as an administrator.
-
To stop the Storm Streaming Server:
net stop "Storm Streaming Server Service"
-
To start the Storm Streaming Server:
net start "Storm Streaming Server Service"
FFMPEG Installation (optional)
If the console shows a message about missing FFMPEG (required for stream transcoding), you can specify its path in the config/preferences.xml file. The configuration is found in the <Transcoder> block, like this:
<Transcoder>
	<FFMPEG>
		<Path>/opt/homebrew/bin/ffmpeg</Path> <!-- optional -->
		<Command>-re -nostdin -i {SOURCE_INPUT} -vsync 1 -vcodec libx264 -preset:v {CPU_USAGE_PRESET} -vf scale={OUTPUT_WIDTH}:{OUTPUT_HEIGHT} -tune {TUNE} -g 30 -fflags nobuffer -probesize 32 -analyzeduration 0 -b:v {VIDEO_BITRATE} -acodec aac -b:a {AUDIO_BITRATE} -async 1 -f flv {STREAM_OUTPUT}</Command>
	</FFMPEG>
	<TranscodeTaskLimit>5</TranscodeTaskLimit>
    <!-- remaining block -->
</Transcoder>
If the FFMPEG path has been added to the environment variables, you can leave the Path field empty — unless you want to explicitly specify which binaries should be used.
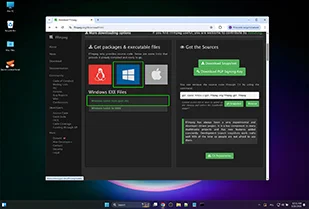
If FFMPEG is not installed on your system at all, you’ll need to install it manually. Here are brief instructions on how to do that:
-
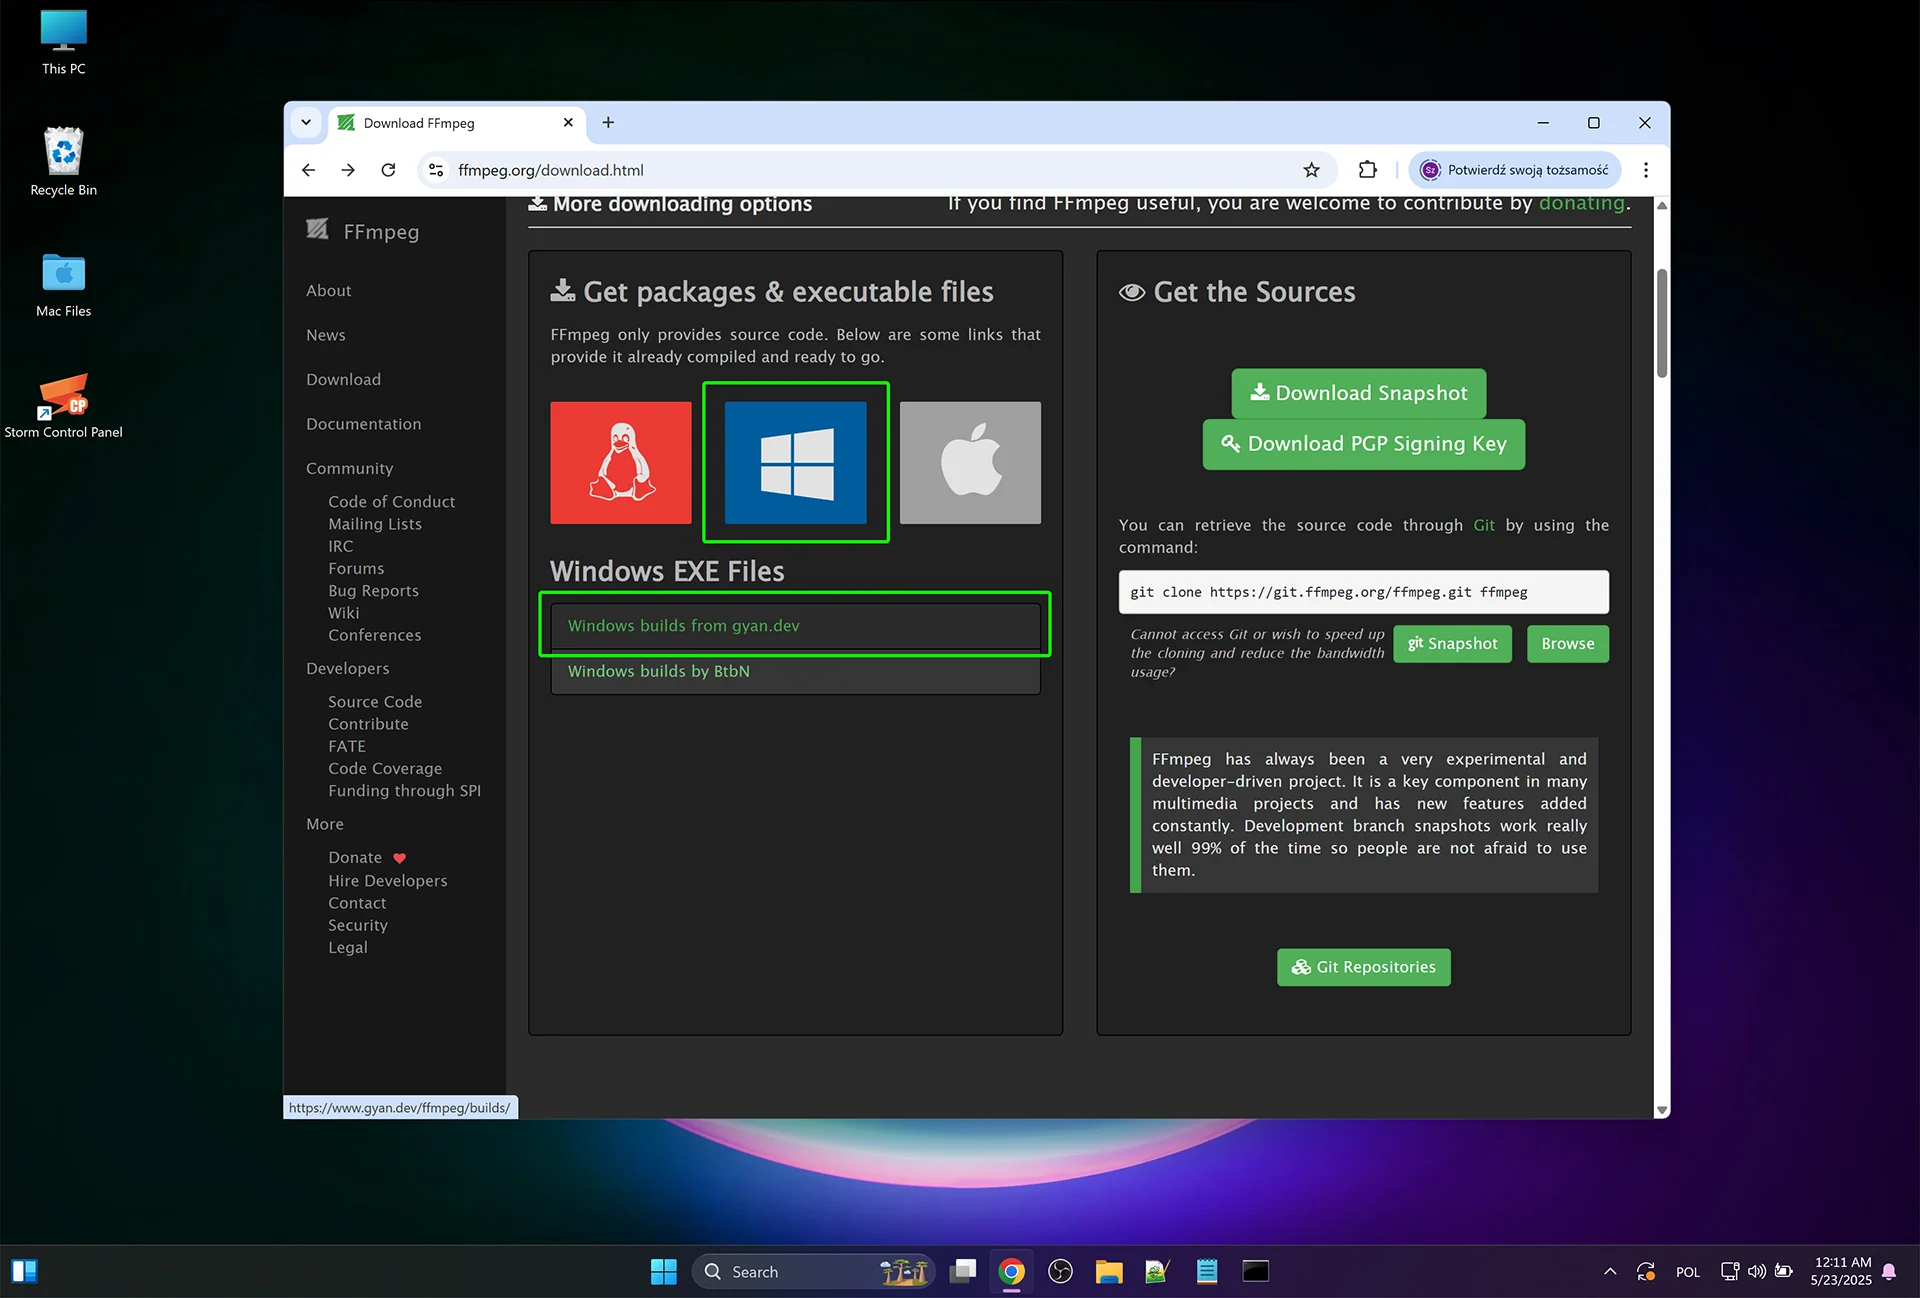
Download FFMPEG
- Go to the official website: https://ffmpeg.org/download.html
-
Click on the Windows link ➔ choose the
gyan.dev link (commonly used).
-
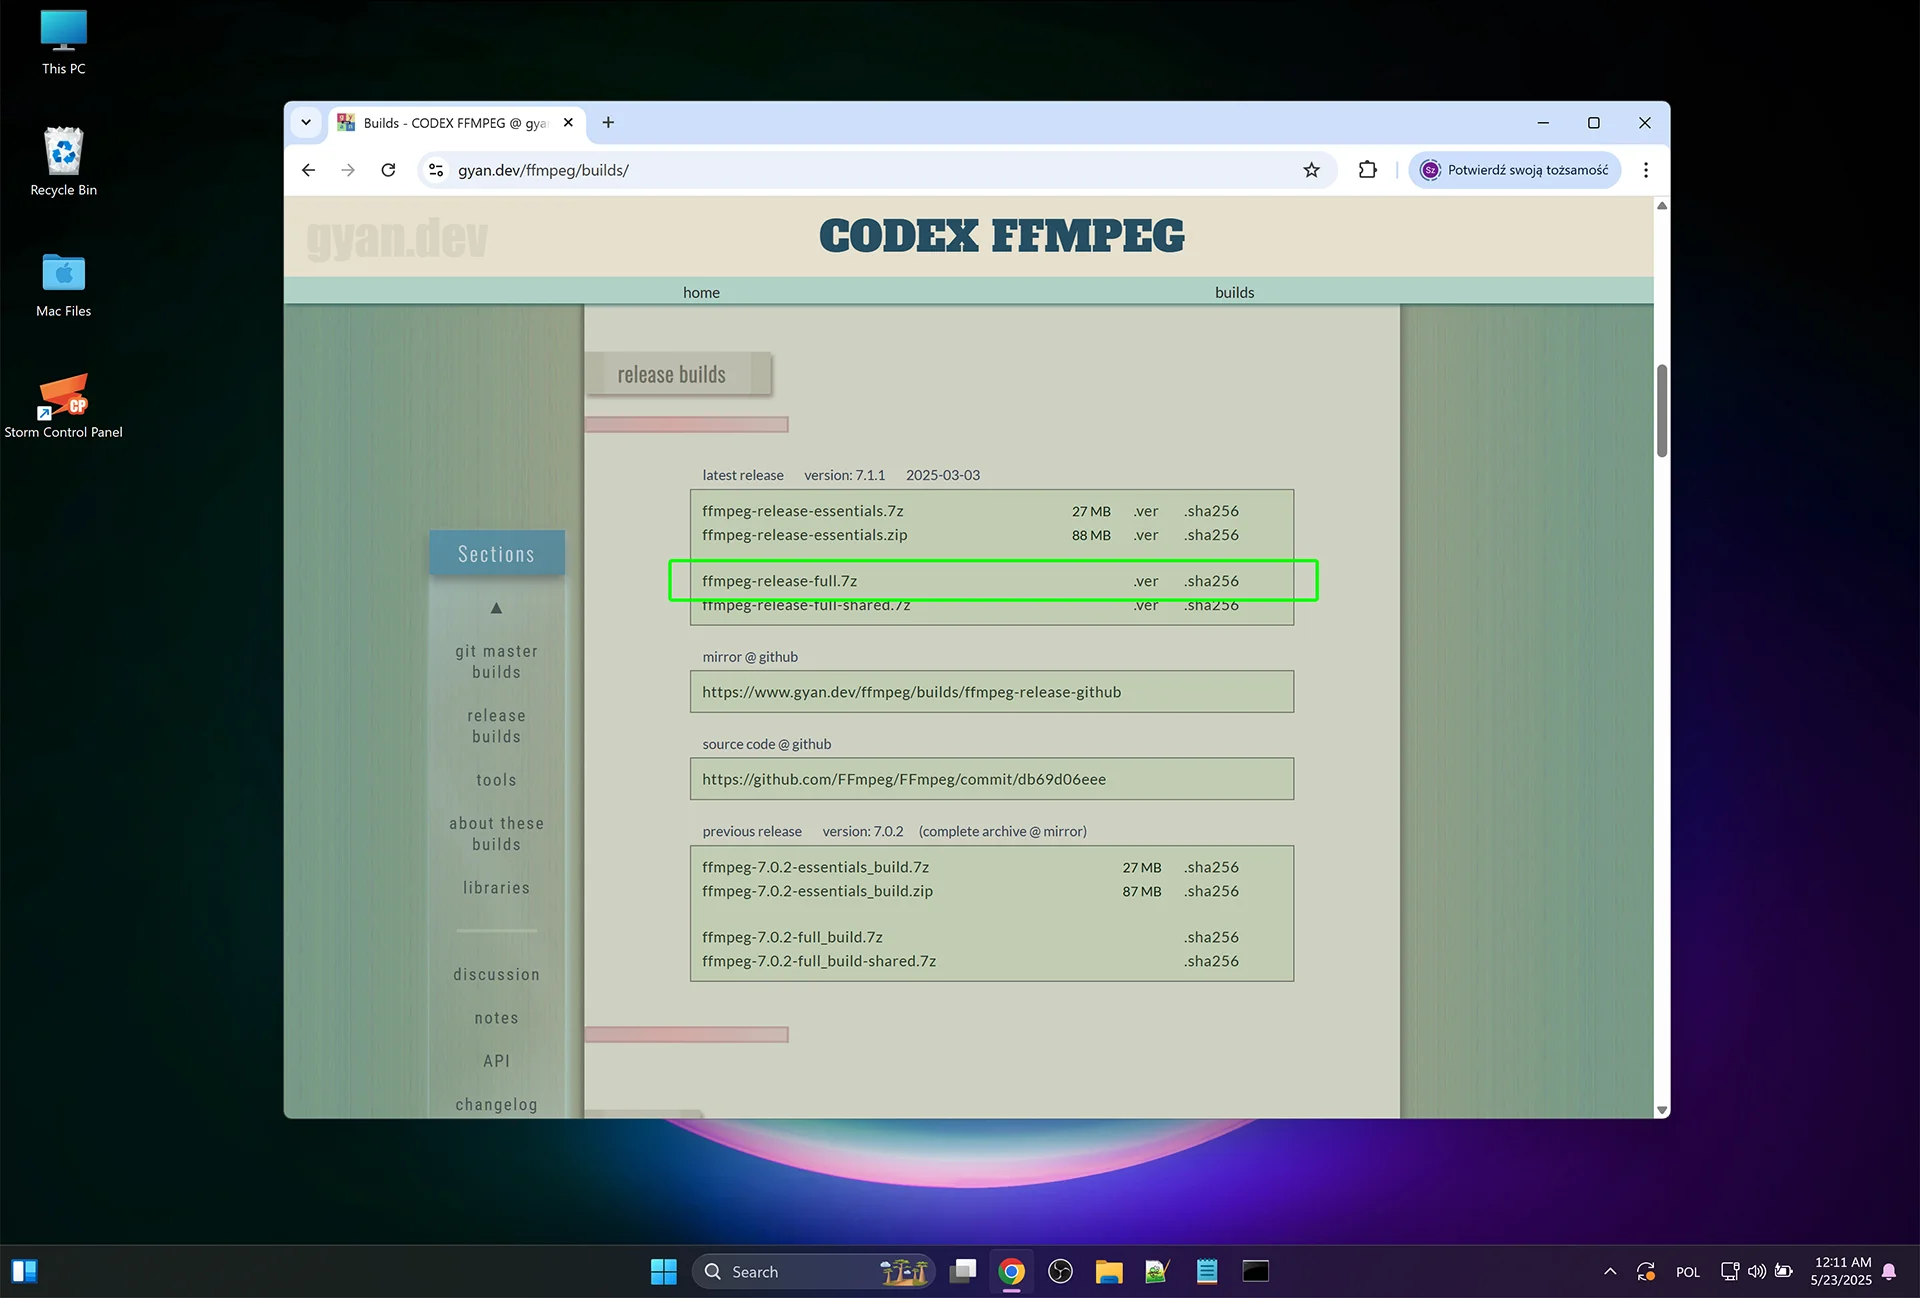
Under the Release builds section, download:
ffmpeg-release-essentials.zip or
ffmpeg-release-full.zip (if you need full
build)

-
Extract ZIP archive
- Extract downloaded .zip file to a folder, such as C:\ffmpeg
-
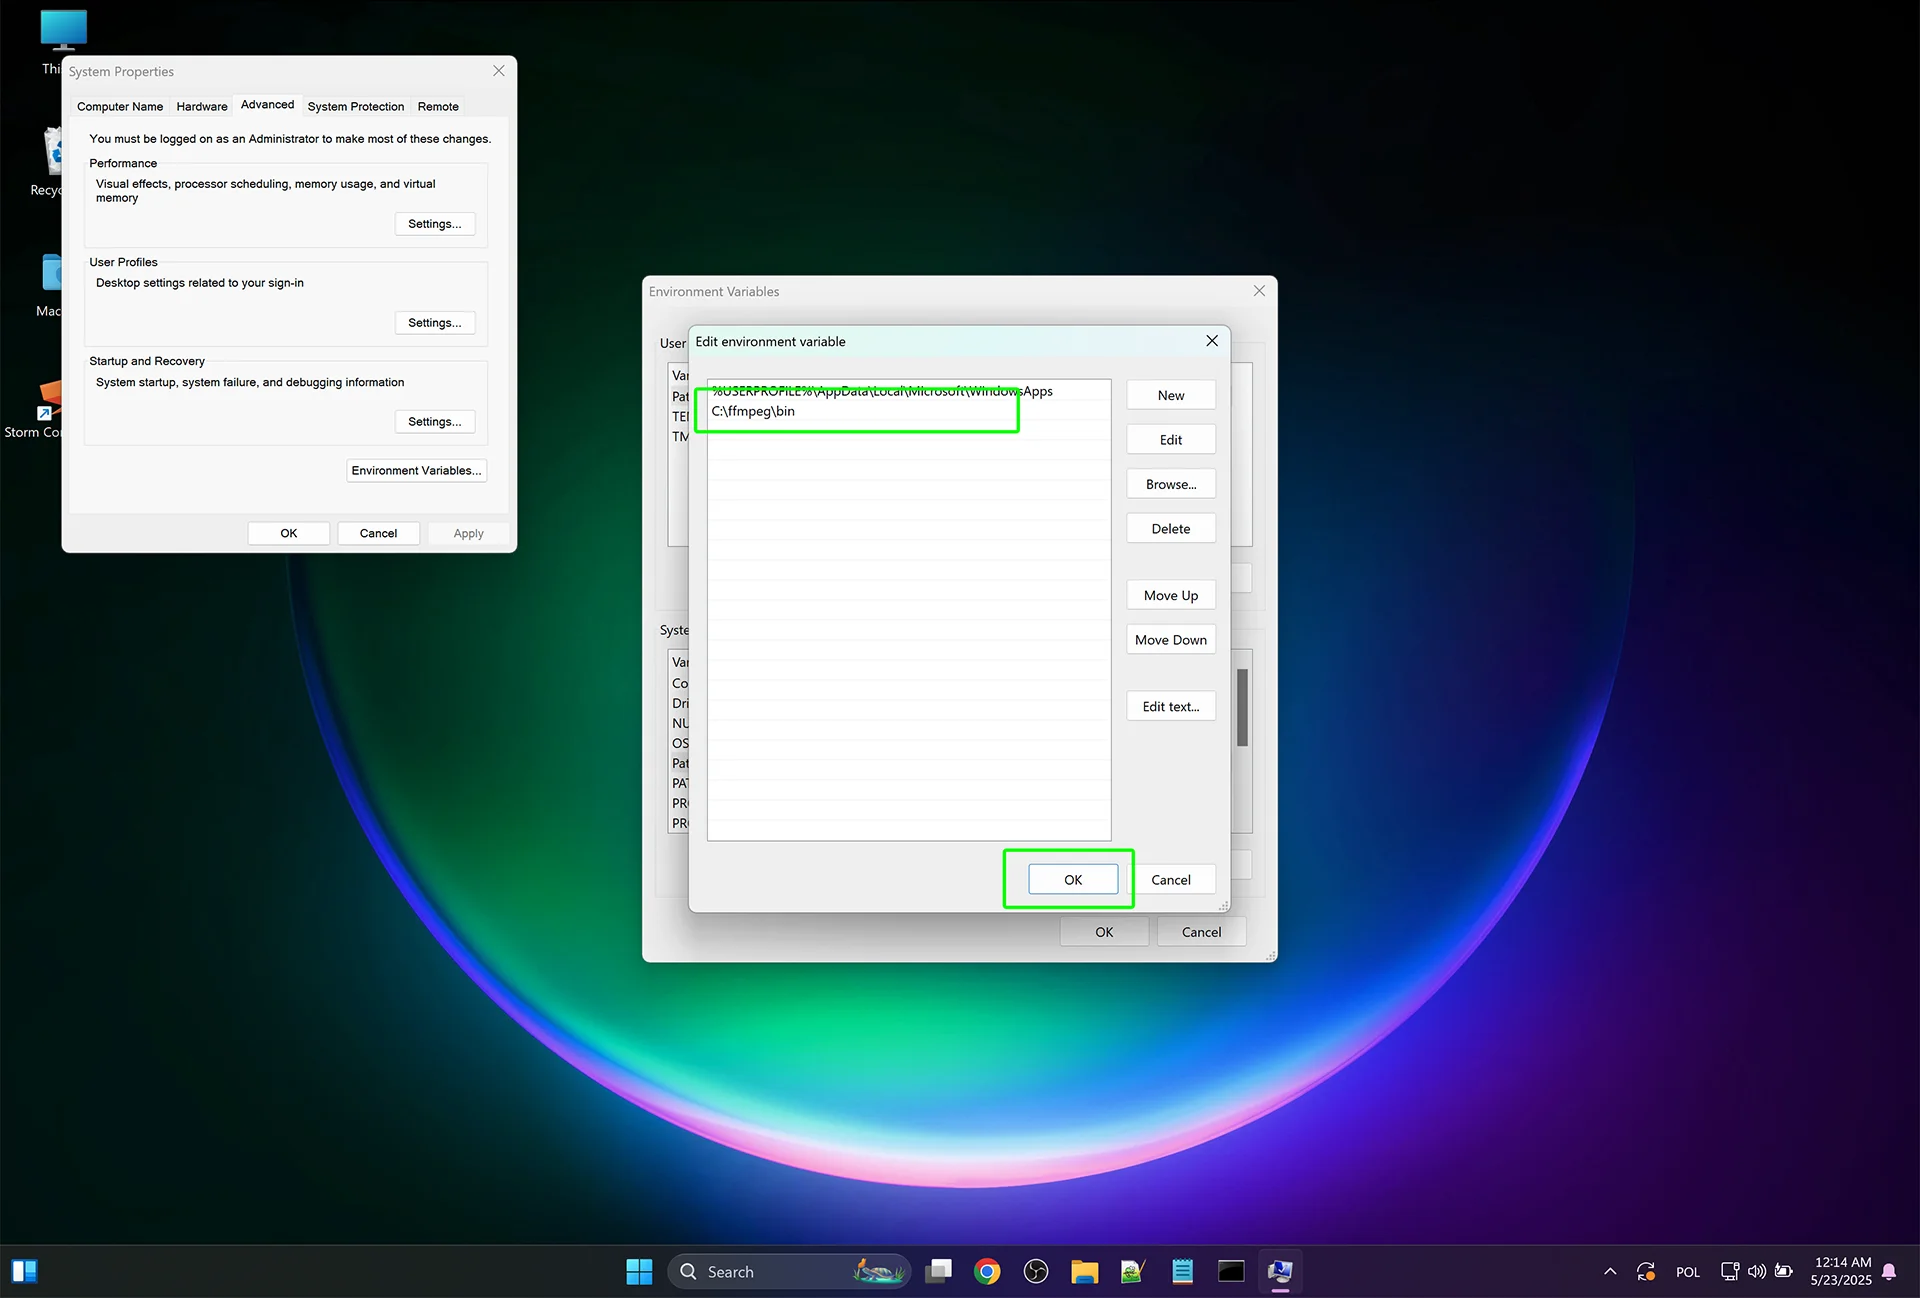
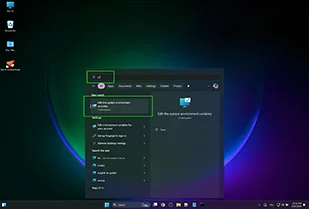
Add FFMPEG to the System PATH
-
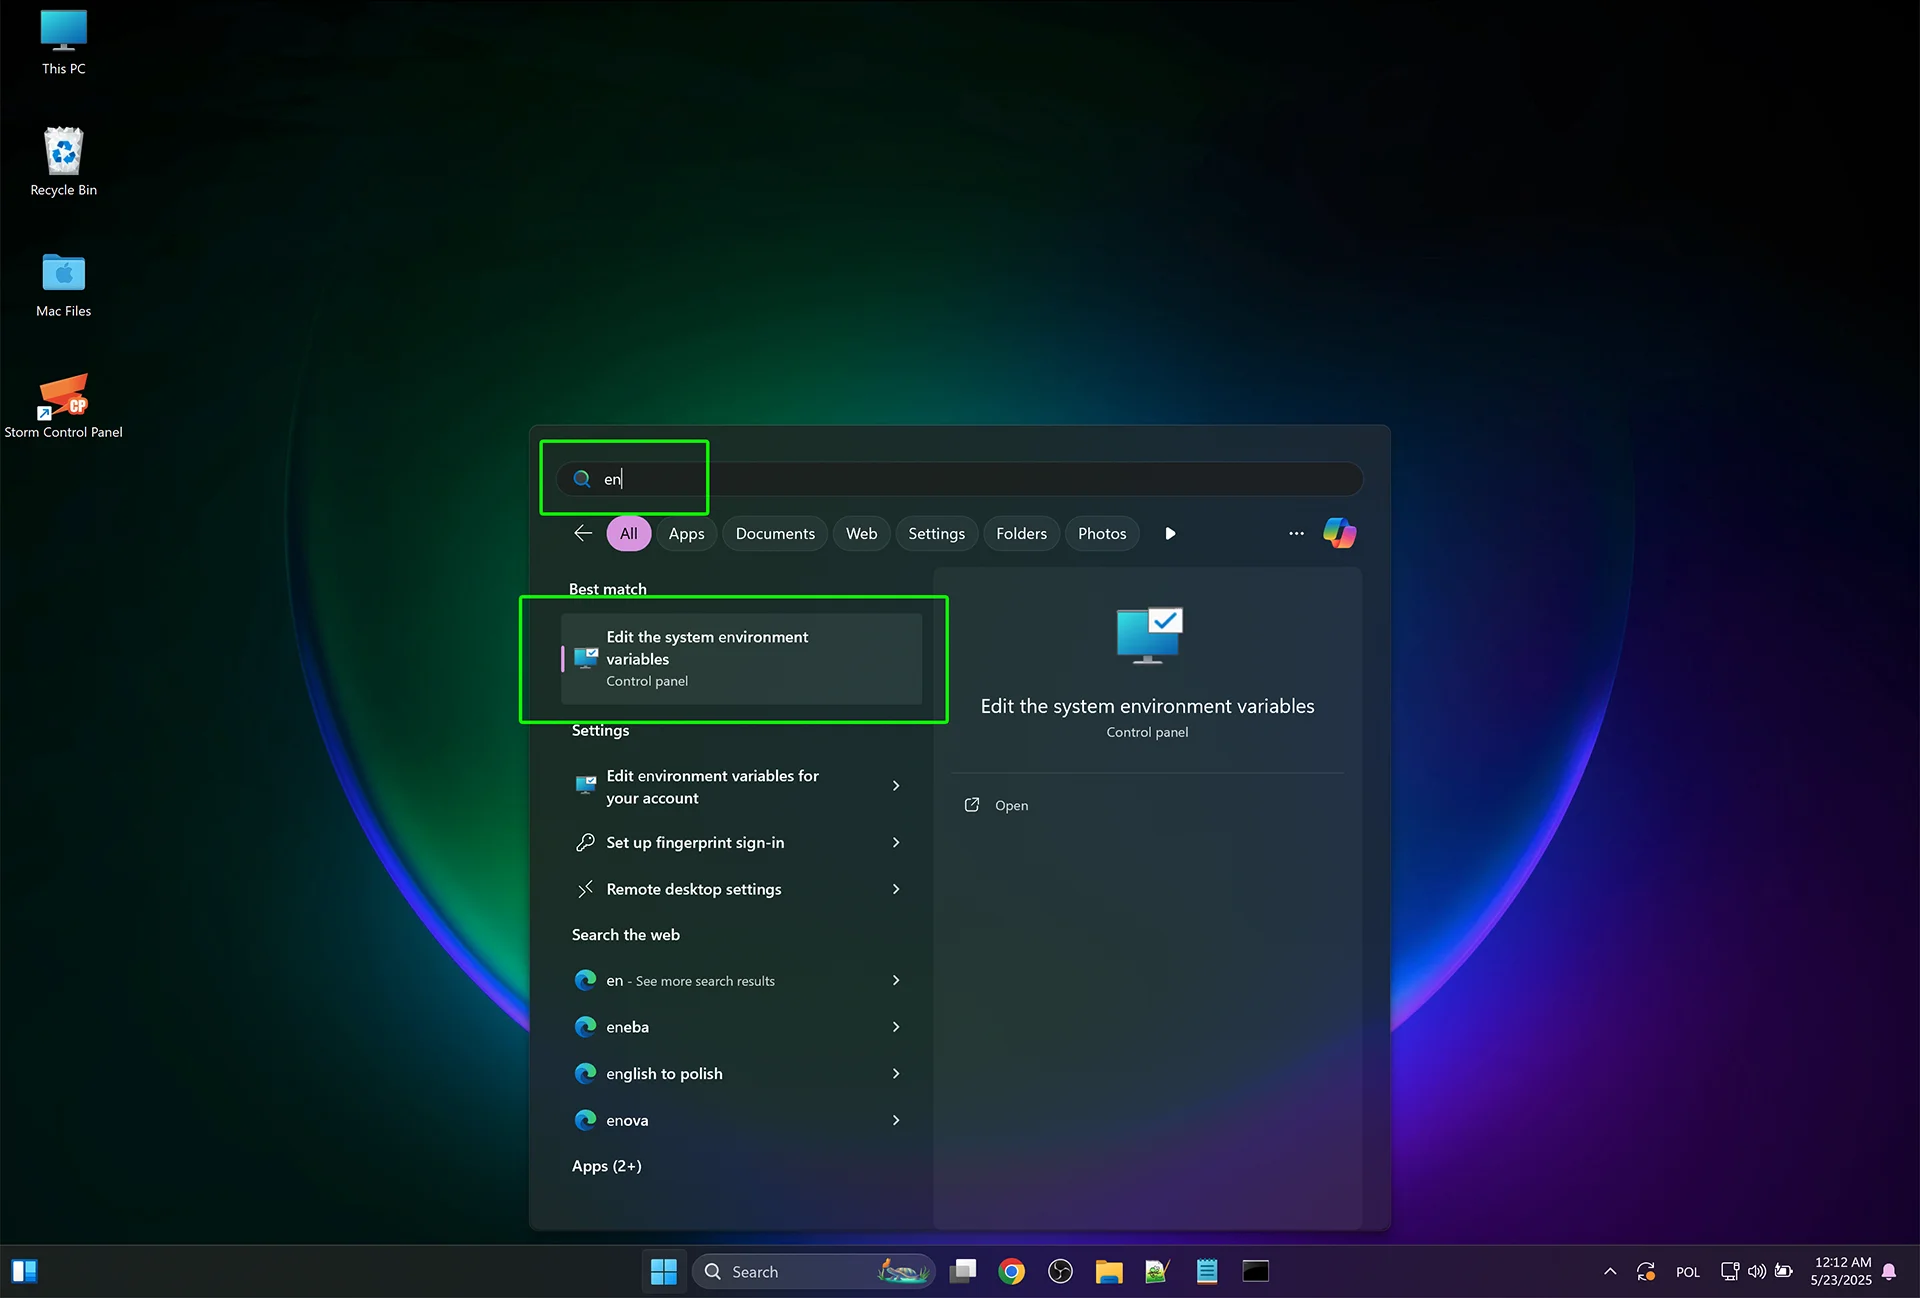
Open the Start Menu, search for environment variables,
and click: "Edit the system environment variables".
-
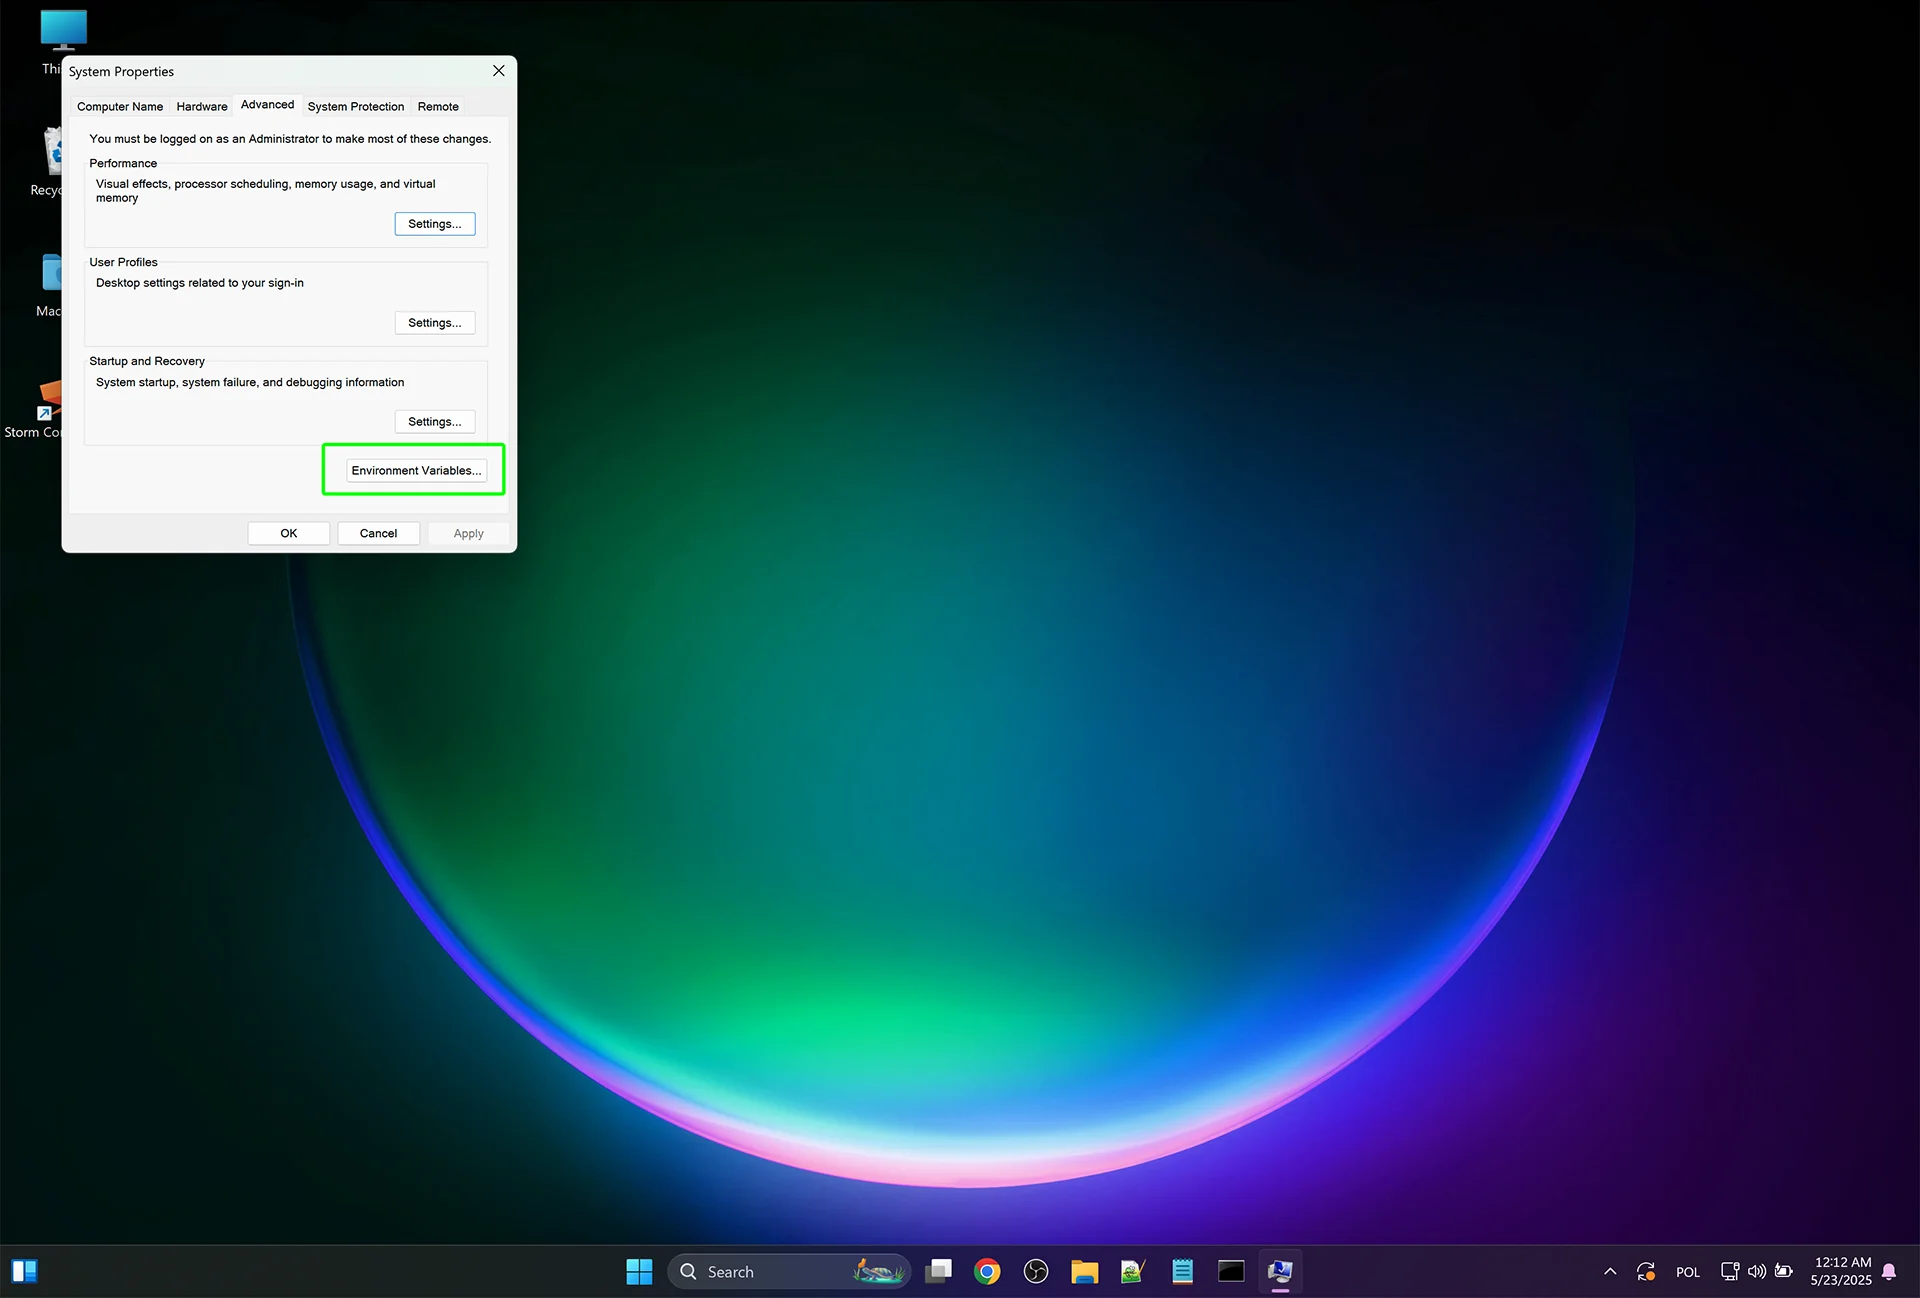
Click the "Environment Variables..." button.

-
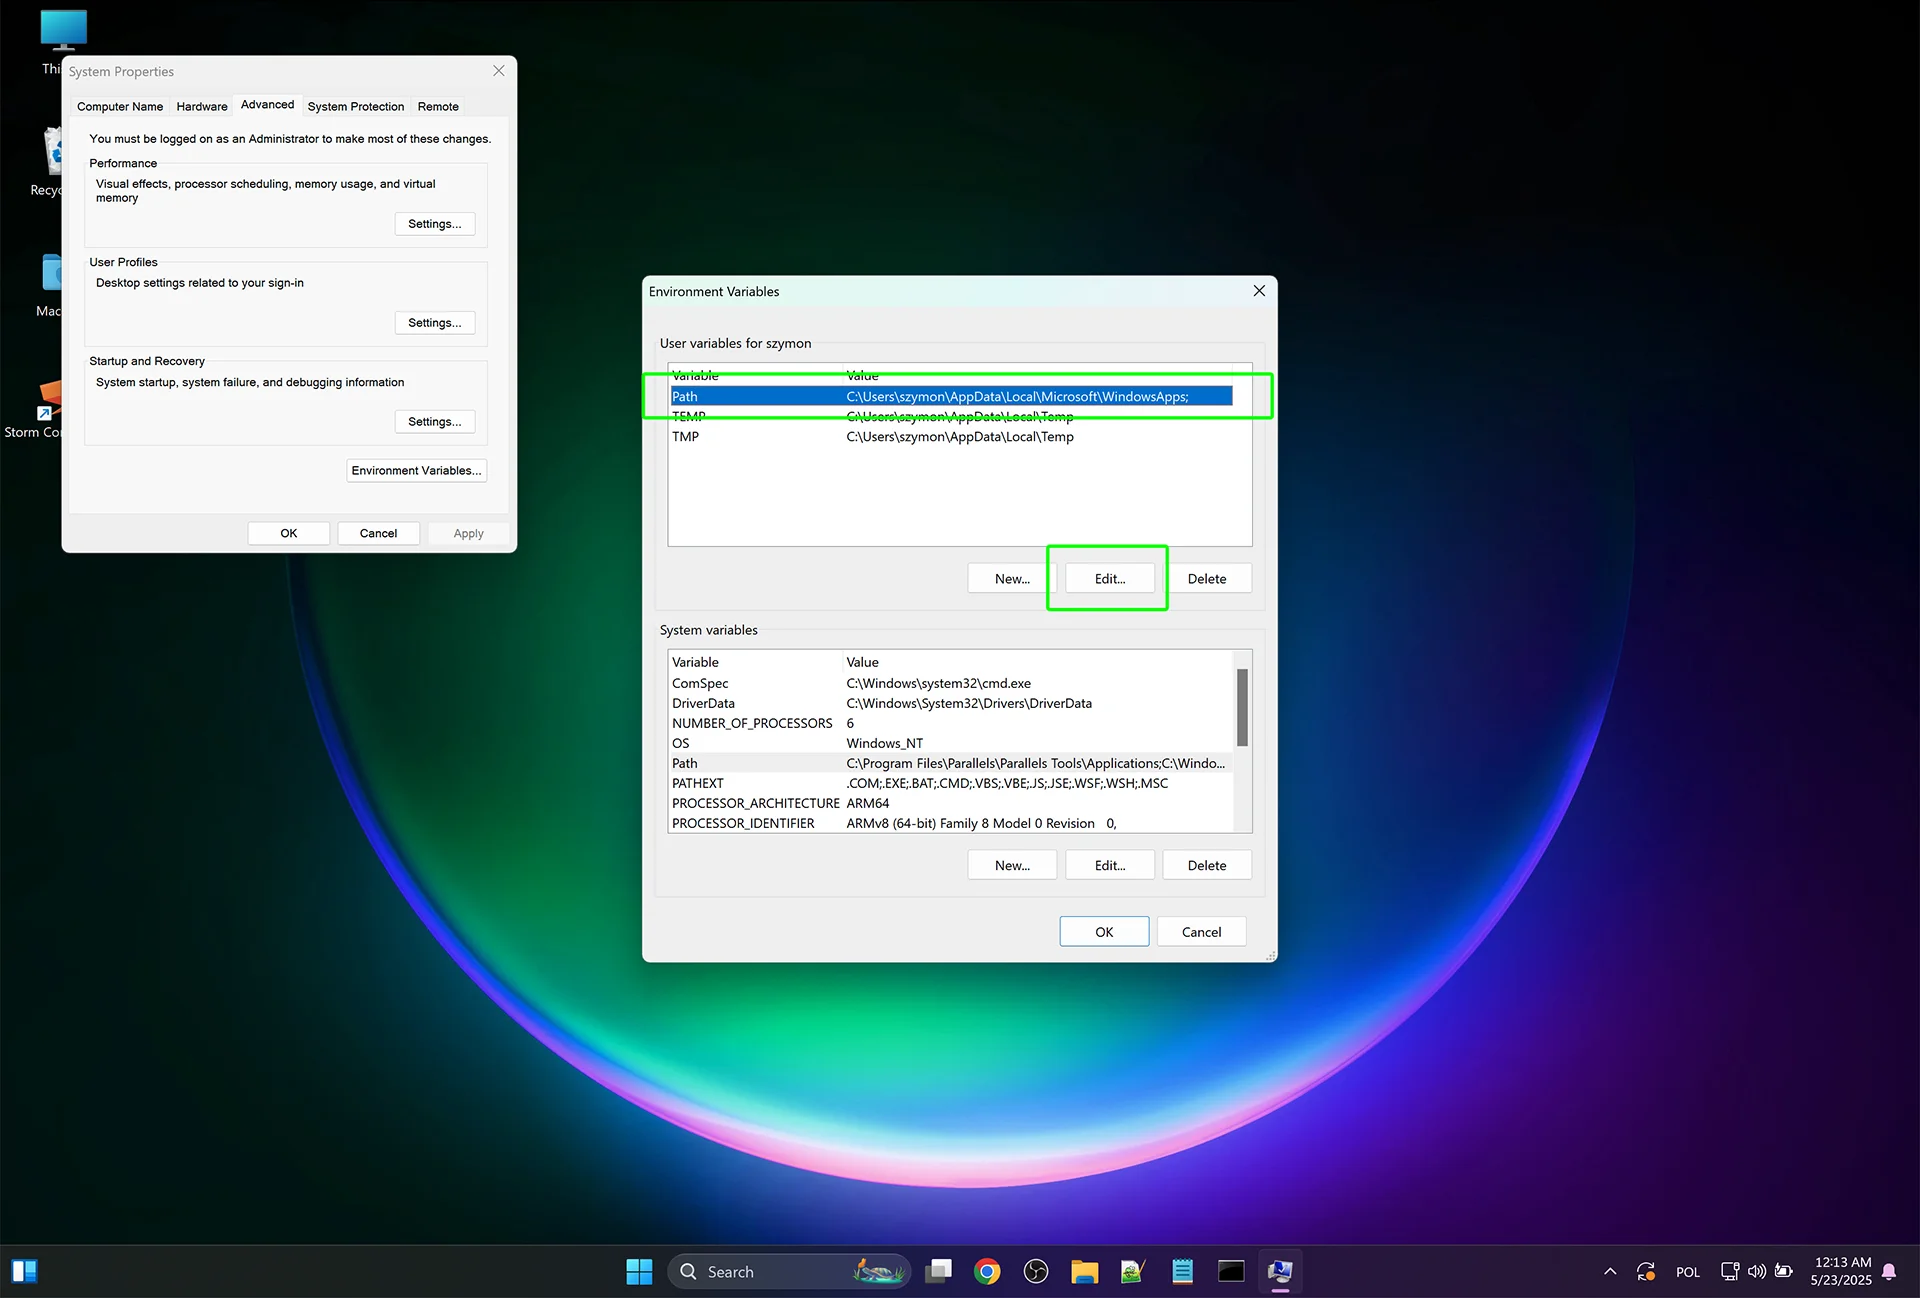
Under System variables, find the
Path variable and click
Edit.

-
Click New and add the path to the bin folder, for
example:
C:\ffmpeg\bin

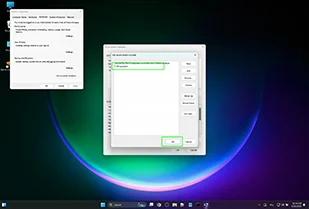
- Confirm all dialogs by clicking OK.
-
Open the Start Menu, search for environment variables,
and click: "Edit the system environment variables".
-
Verify the Installation
- Open the Command Prompt (cmd)
- Type: ffmpeg -version (and hit enter)
- You should see FFmpeg version information displayed.
Support Needed?
Create a free ticket and our support team will provide you necessary assistance.